MyDIY

Reader

Read the latest posts from MyDIY.

from My DIY

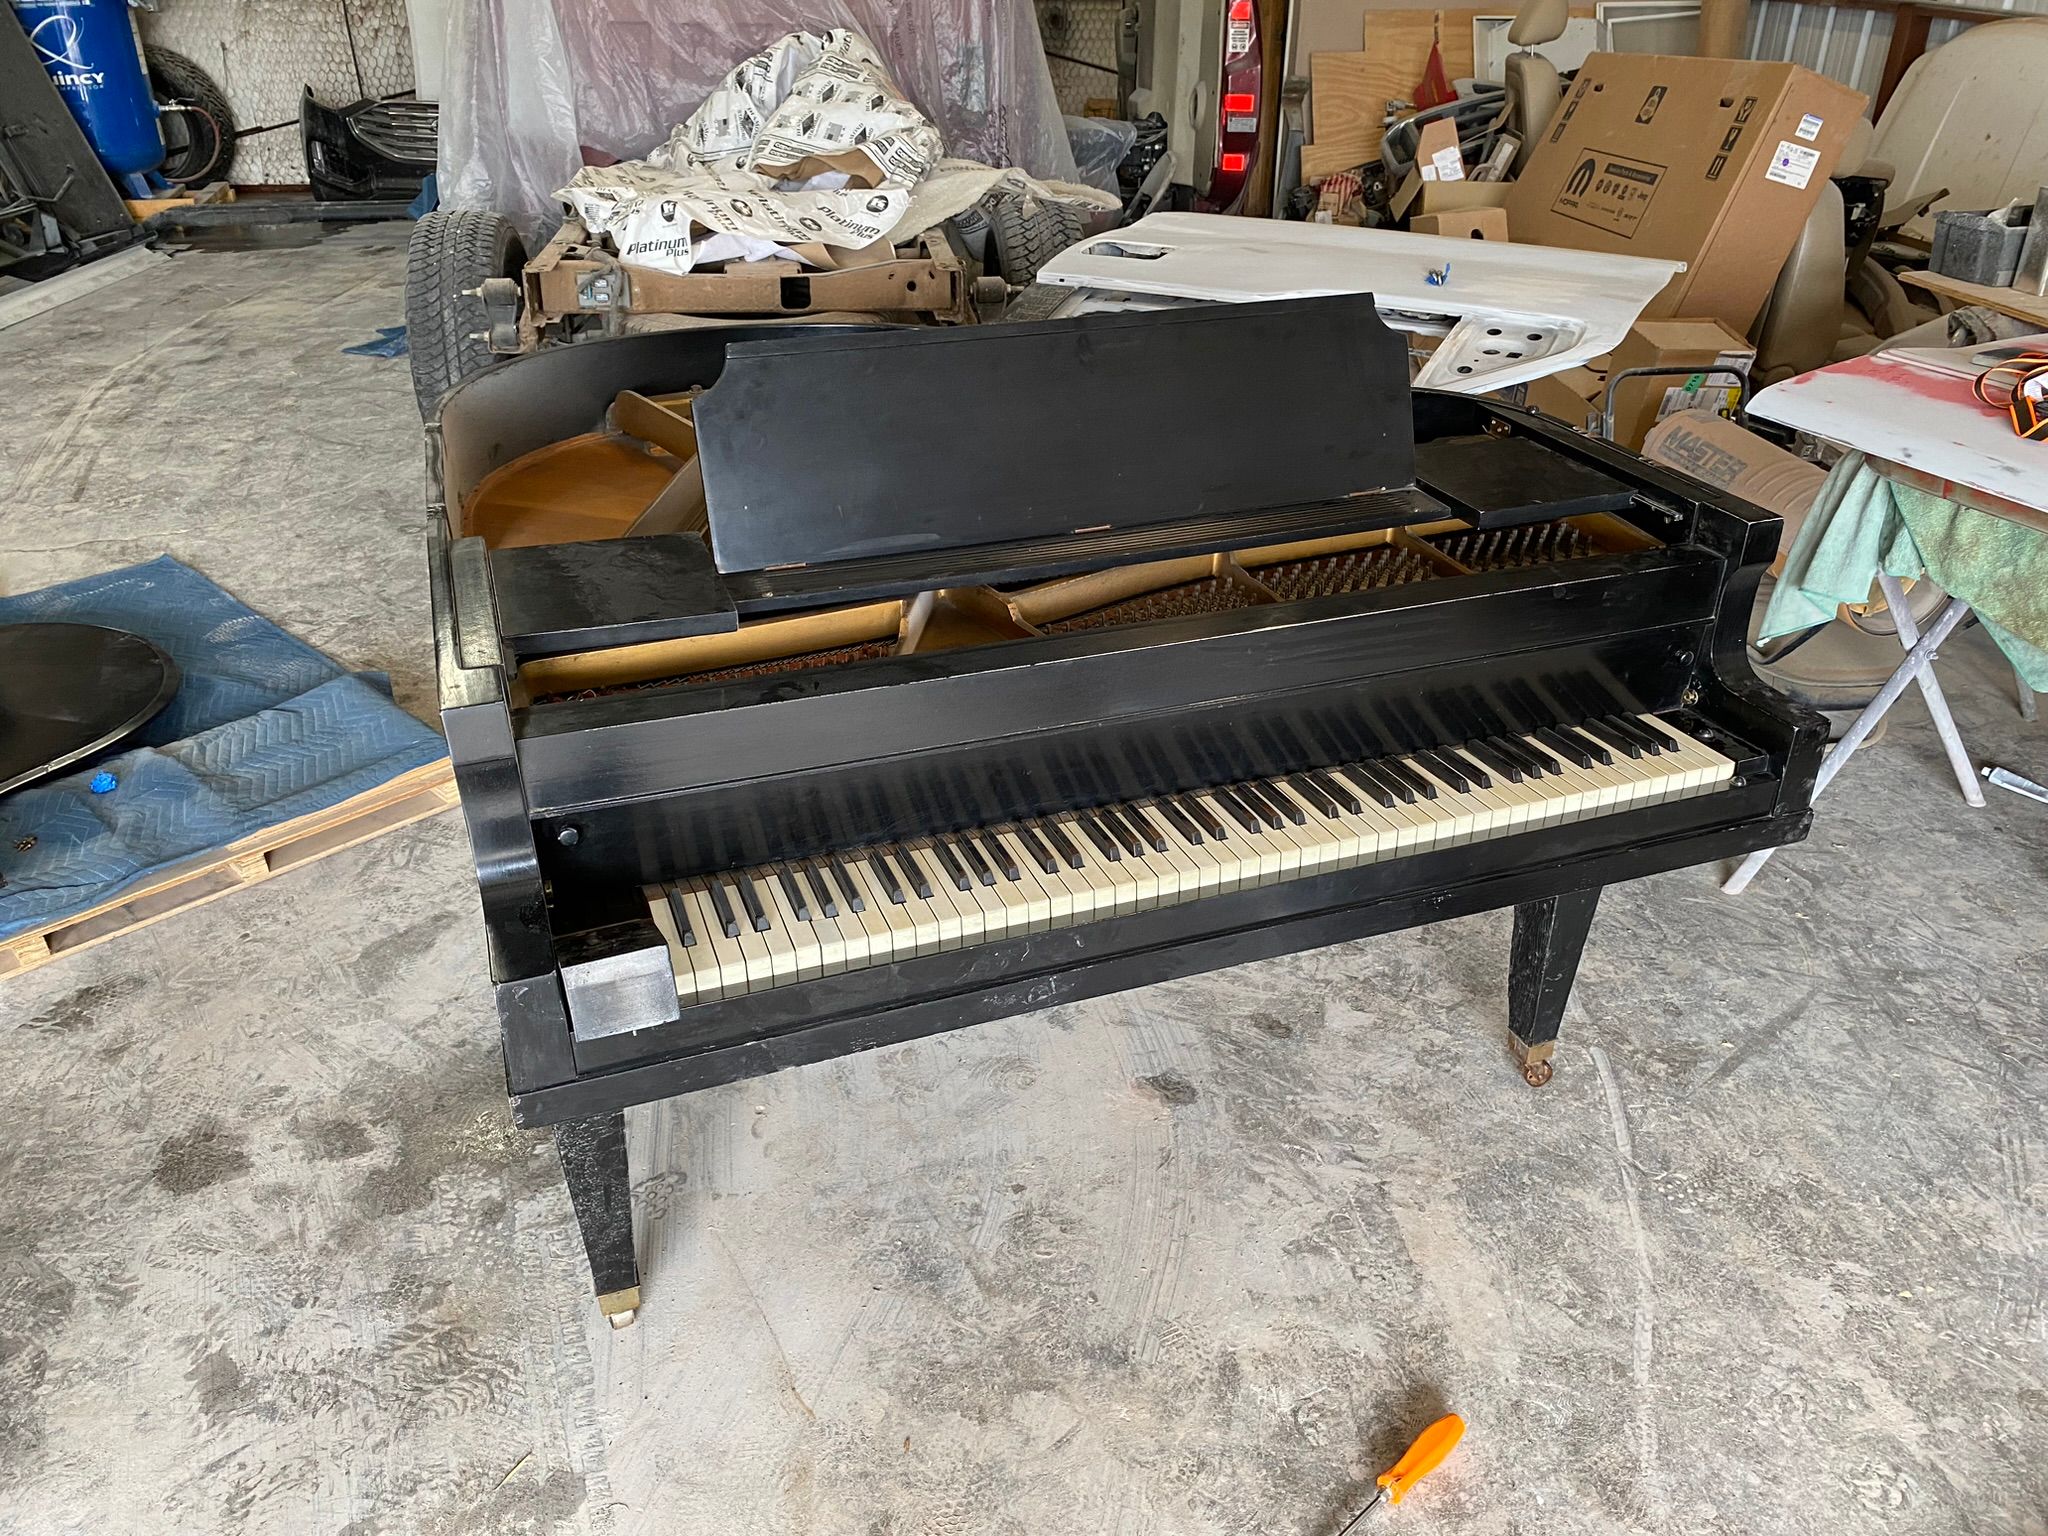
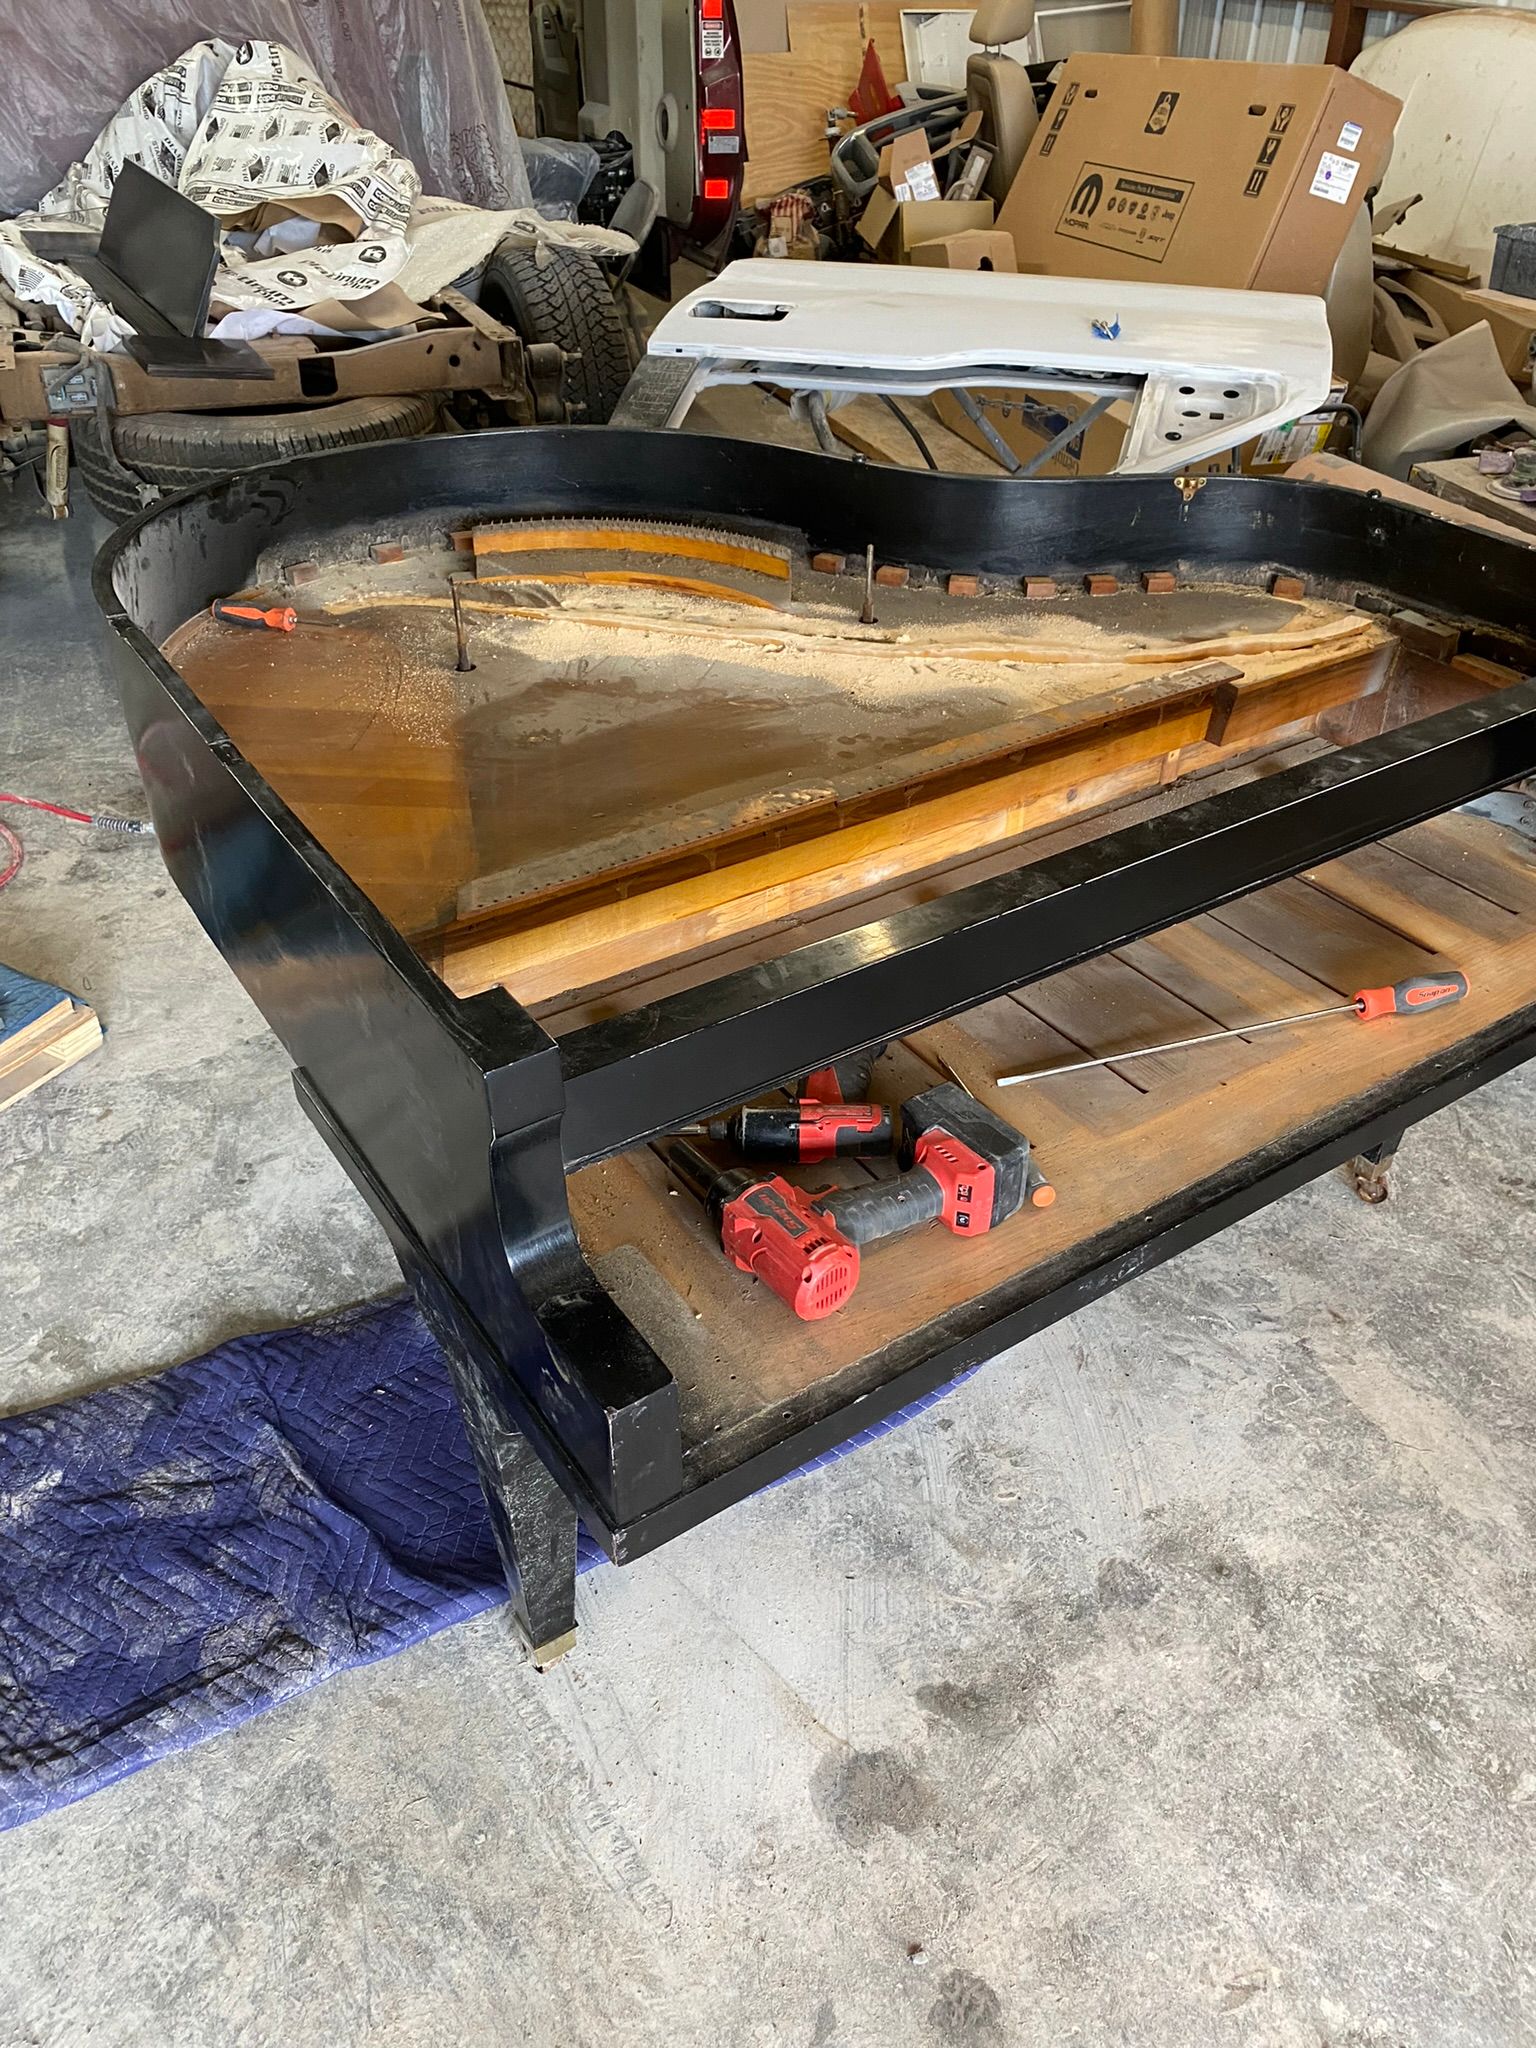
After a long lull in productivity toward my DIY Grand Piano goal, my wife and I got back to work about a week before the American Thanksgiving holiday in late November.

We had a plan of just roughing the current paint, then painting over it with new primer, paint, and clear coat. Sanding each phase after a few coats of each to try and give it a really nice shine.

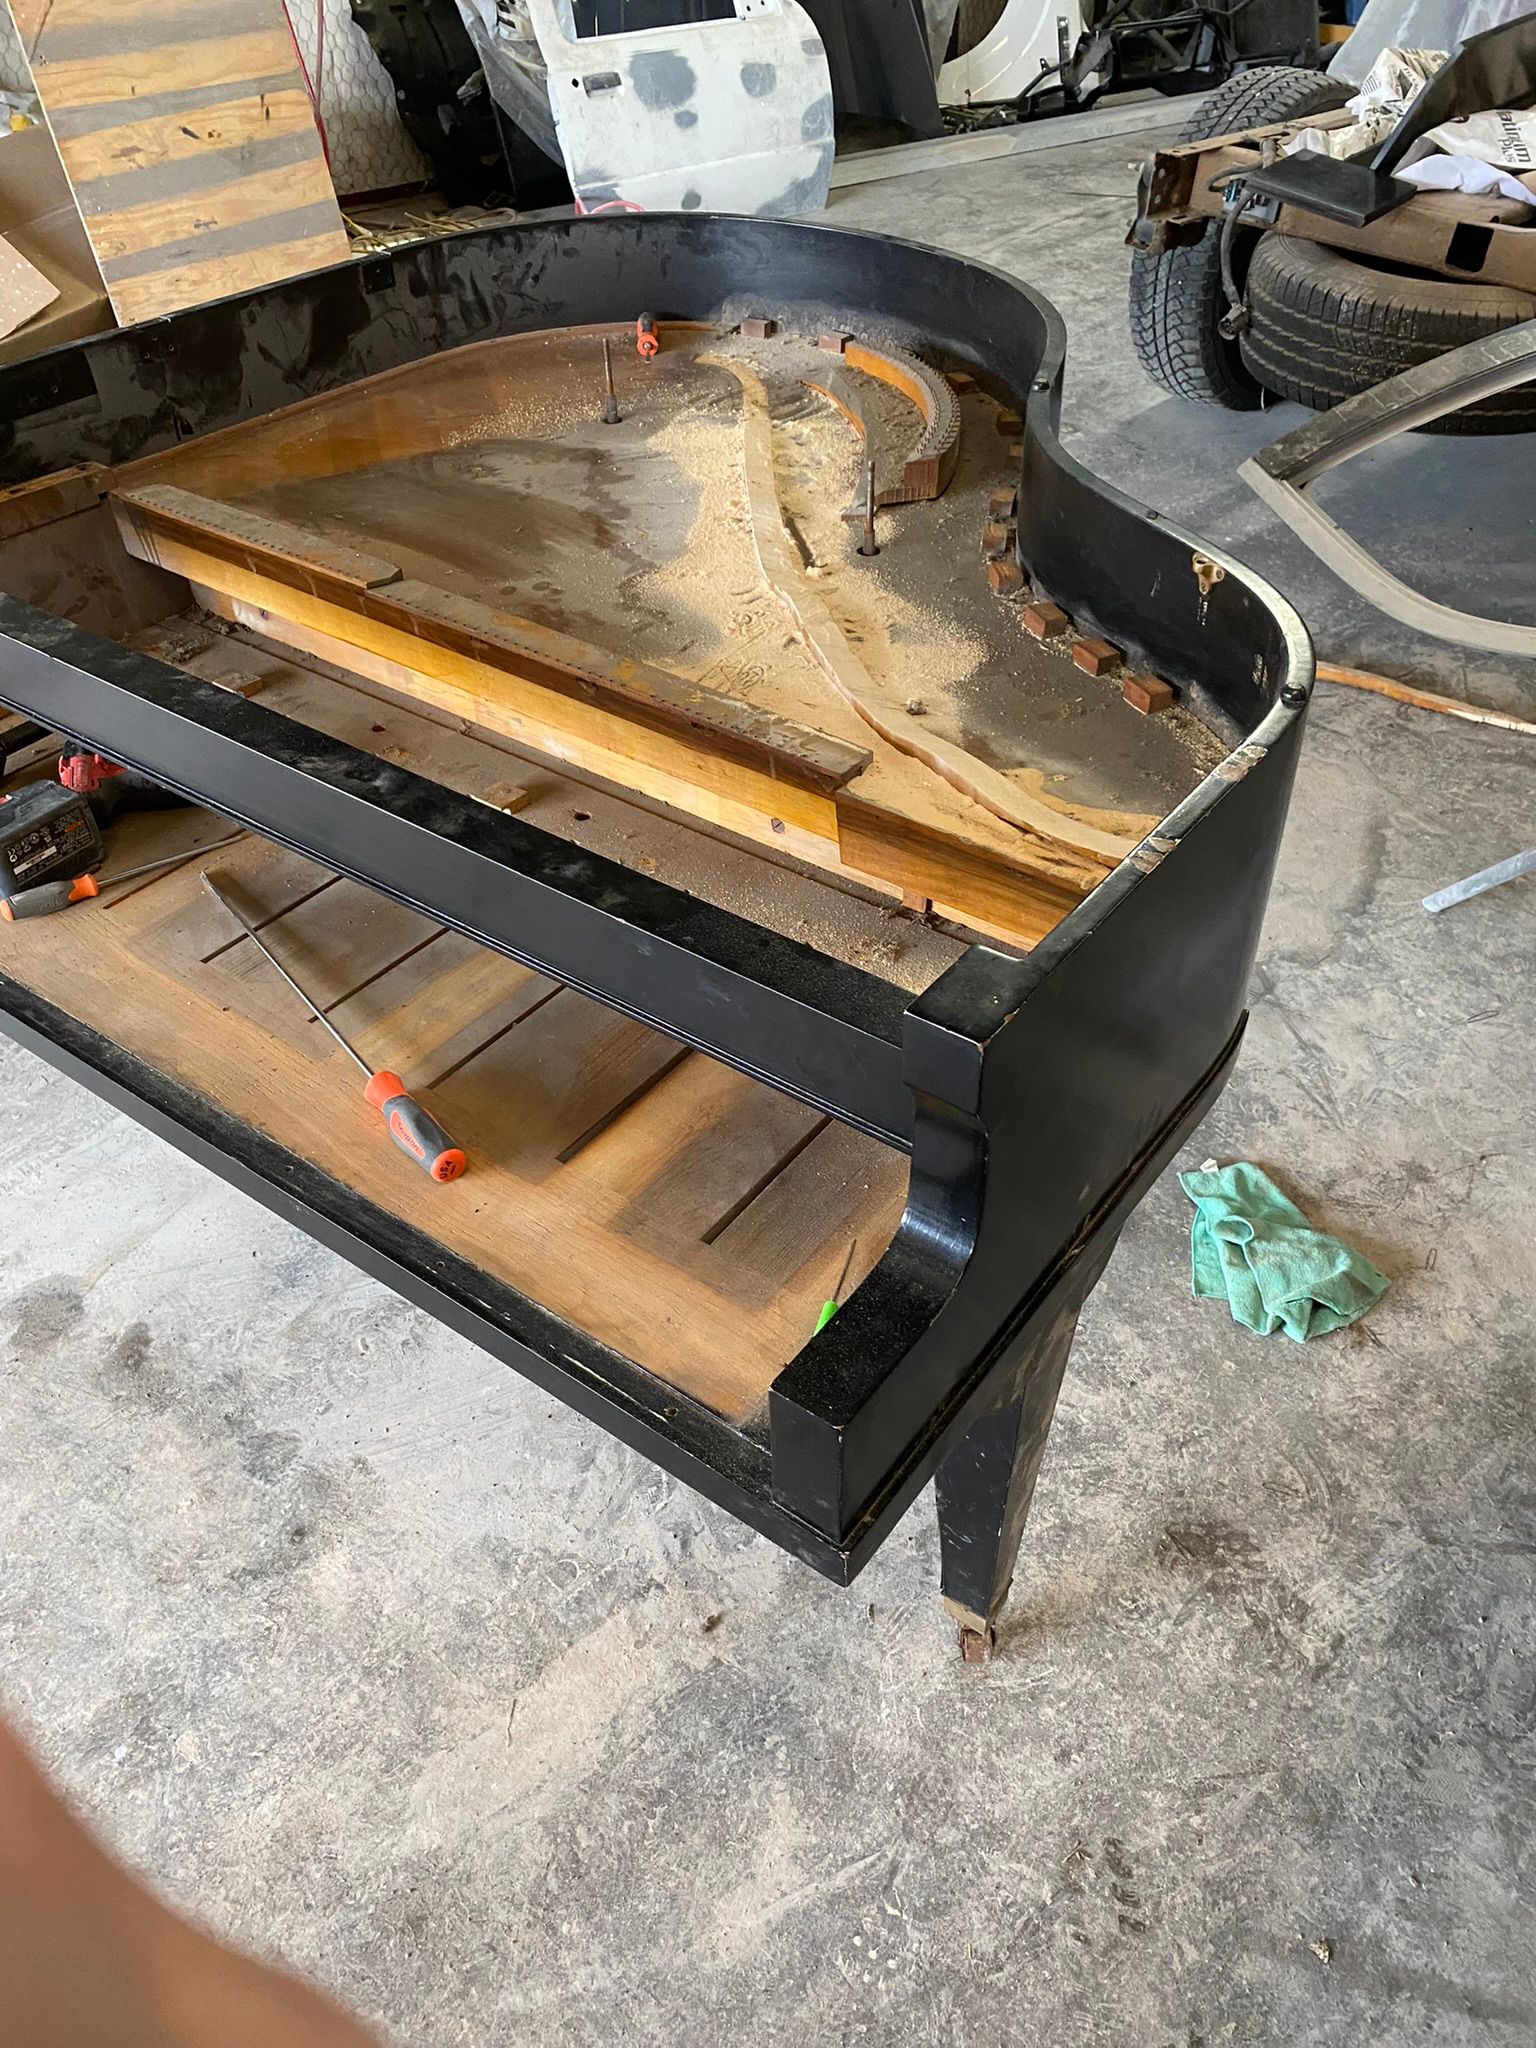
Luckily, my brother-in-law, who happens to paint cars and do body work for a living, called and said he'd be coming for Thanksgiving, and would bring his gear to help us out; but he said we needed to sand everything down to just the wood. No left-over old paint.

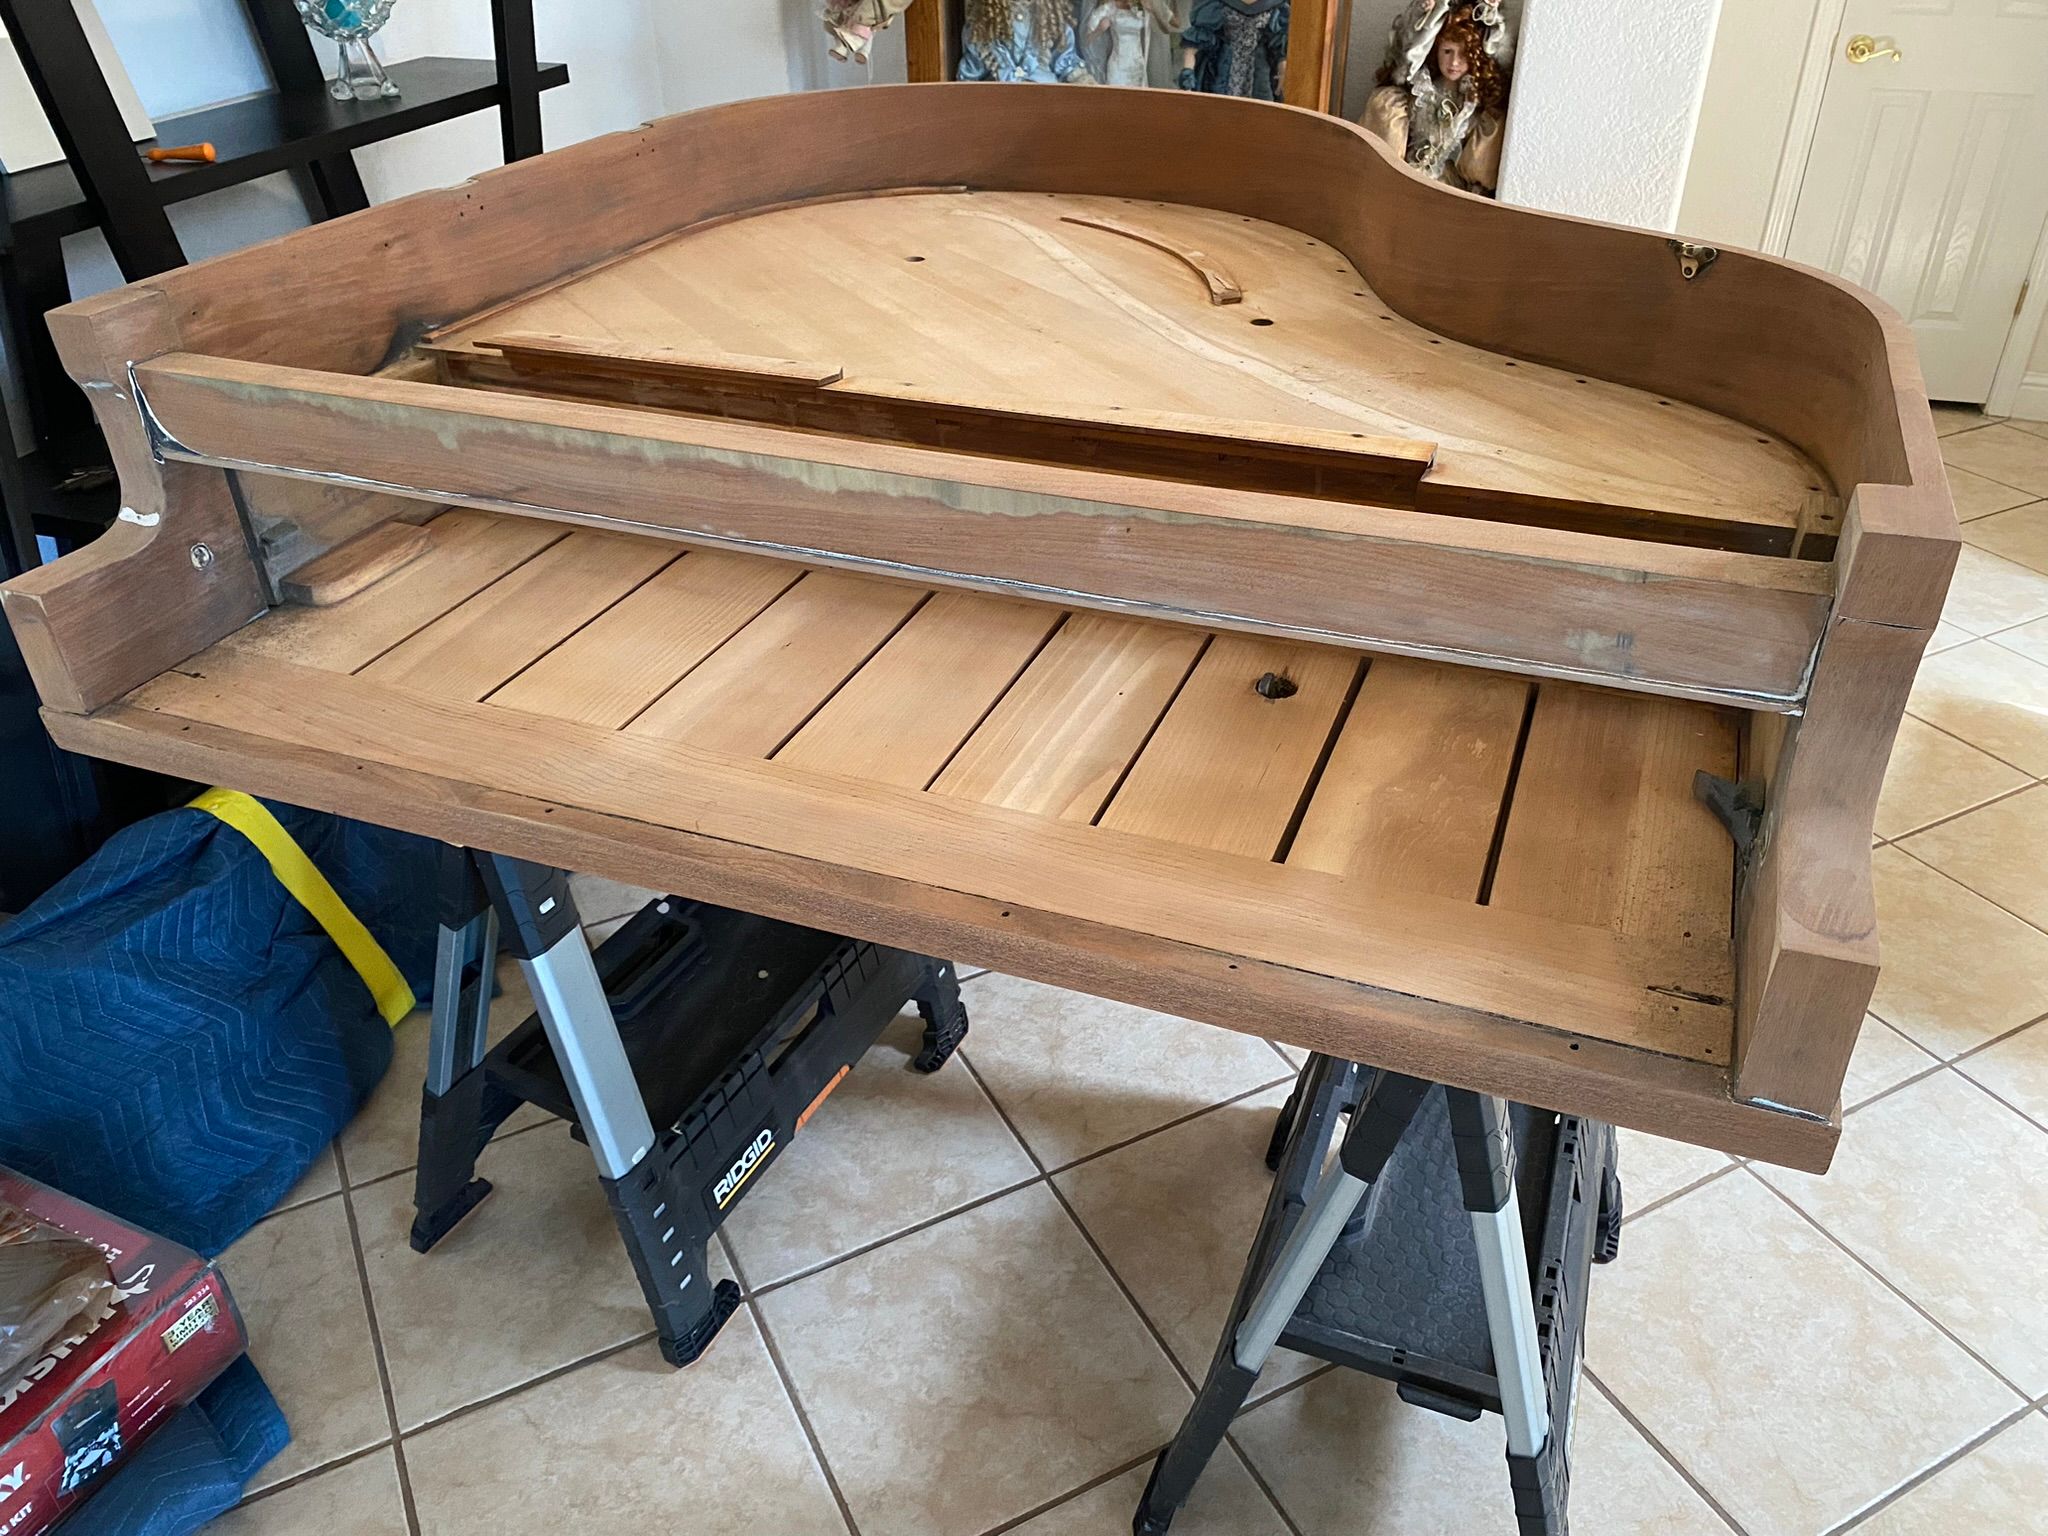
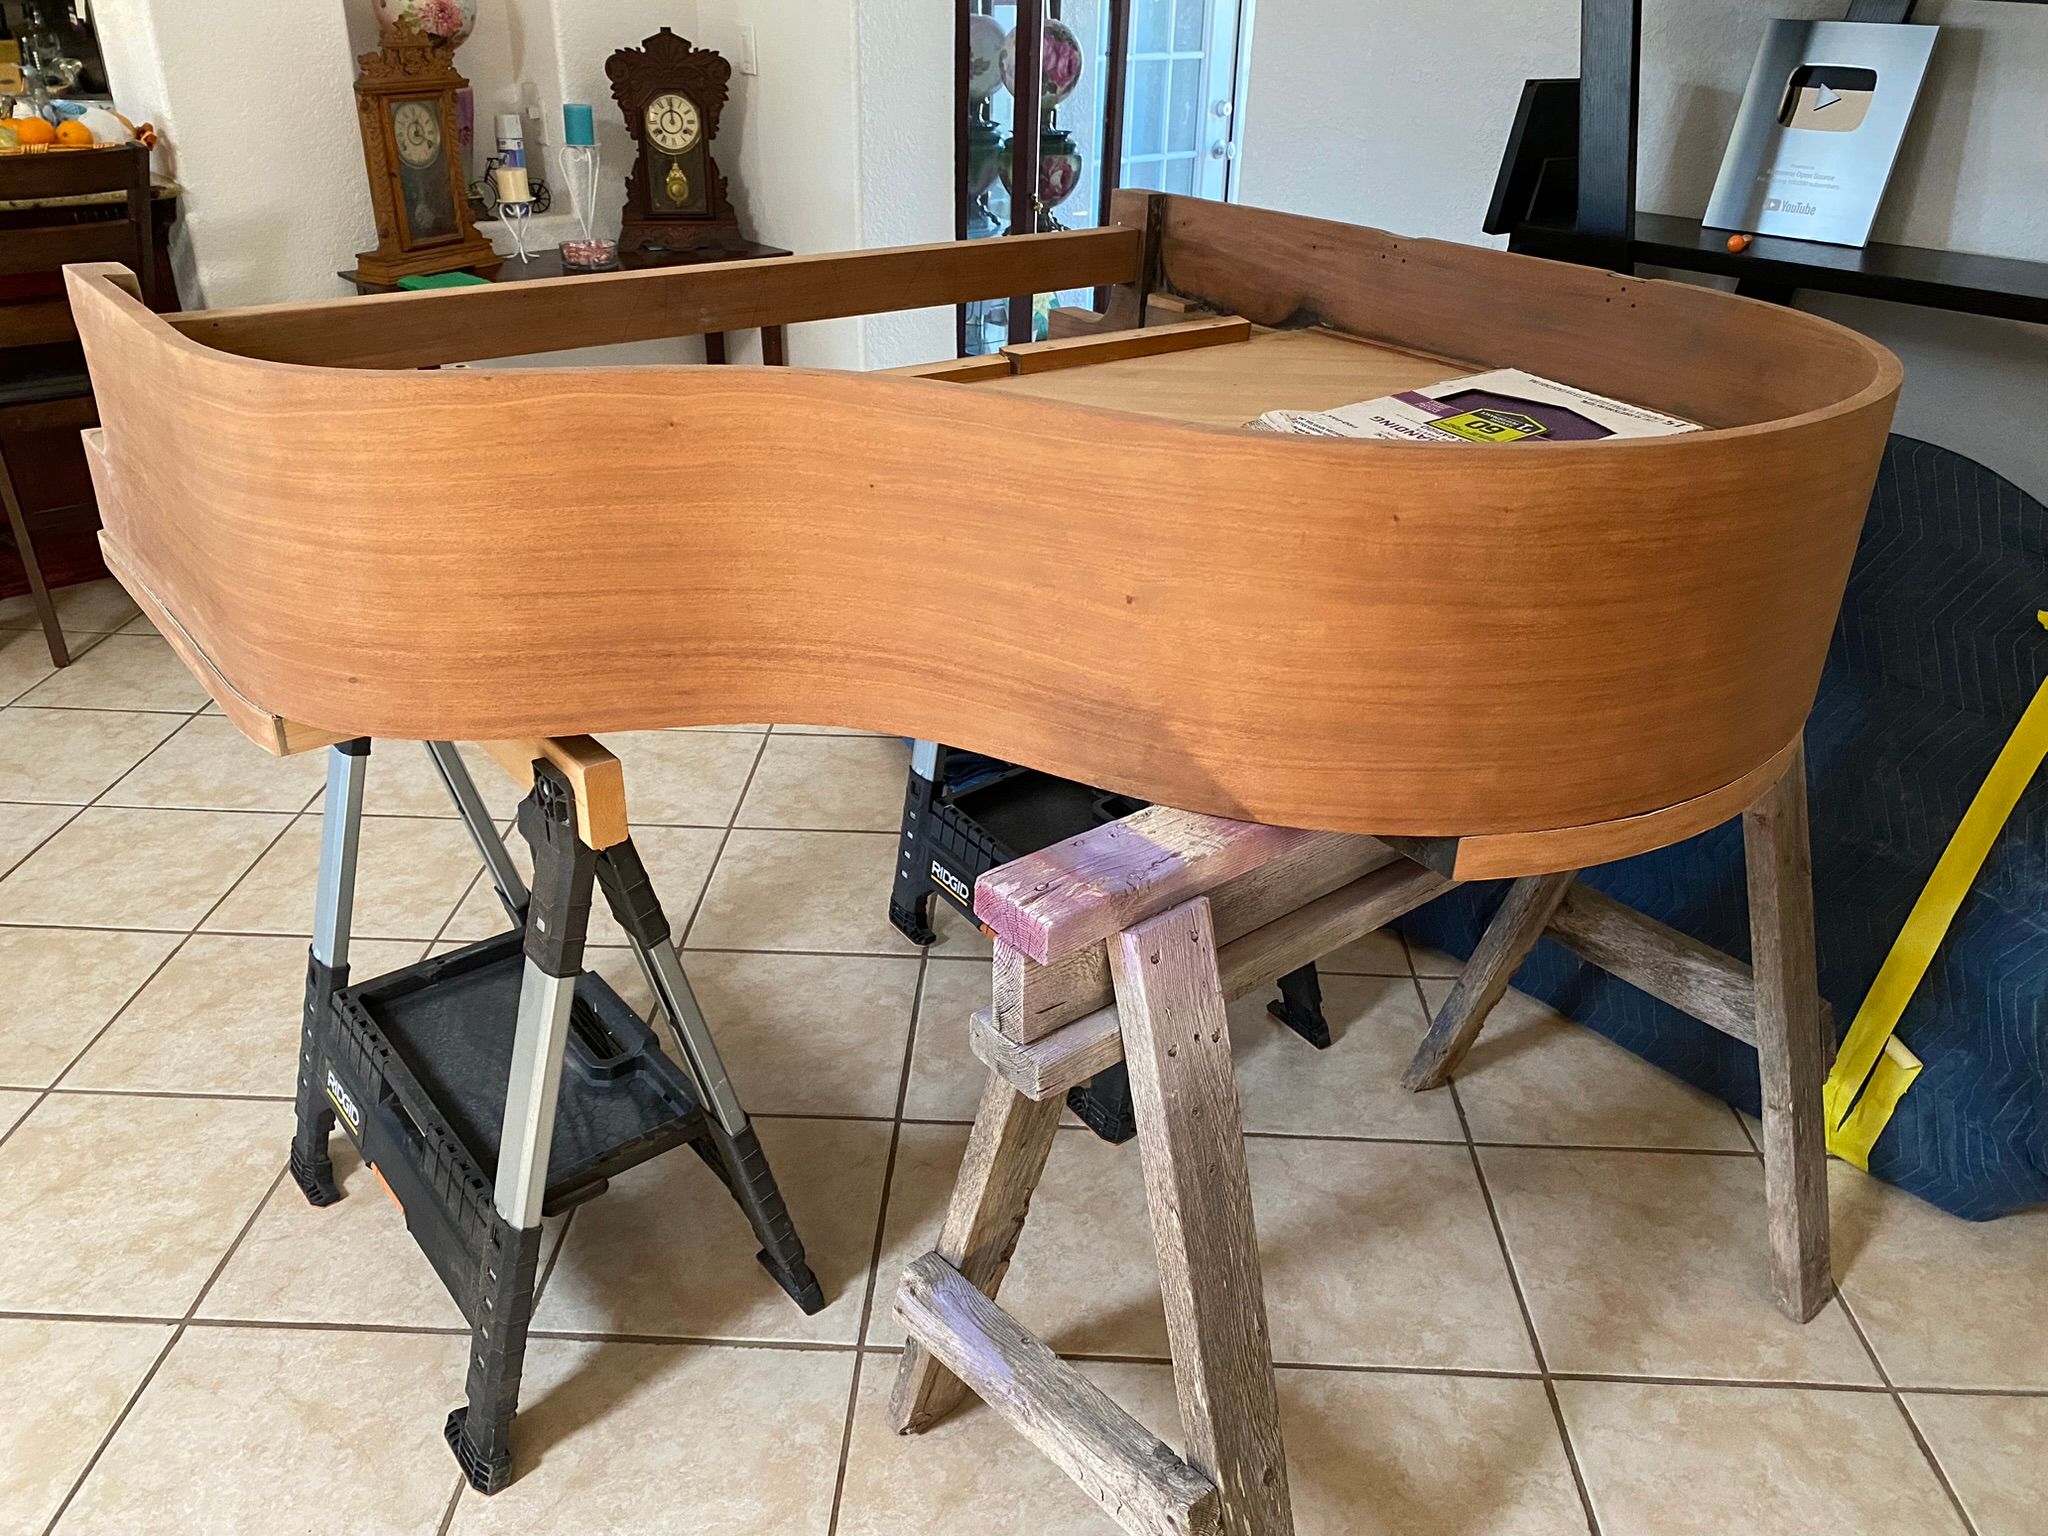
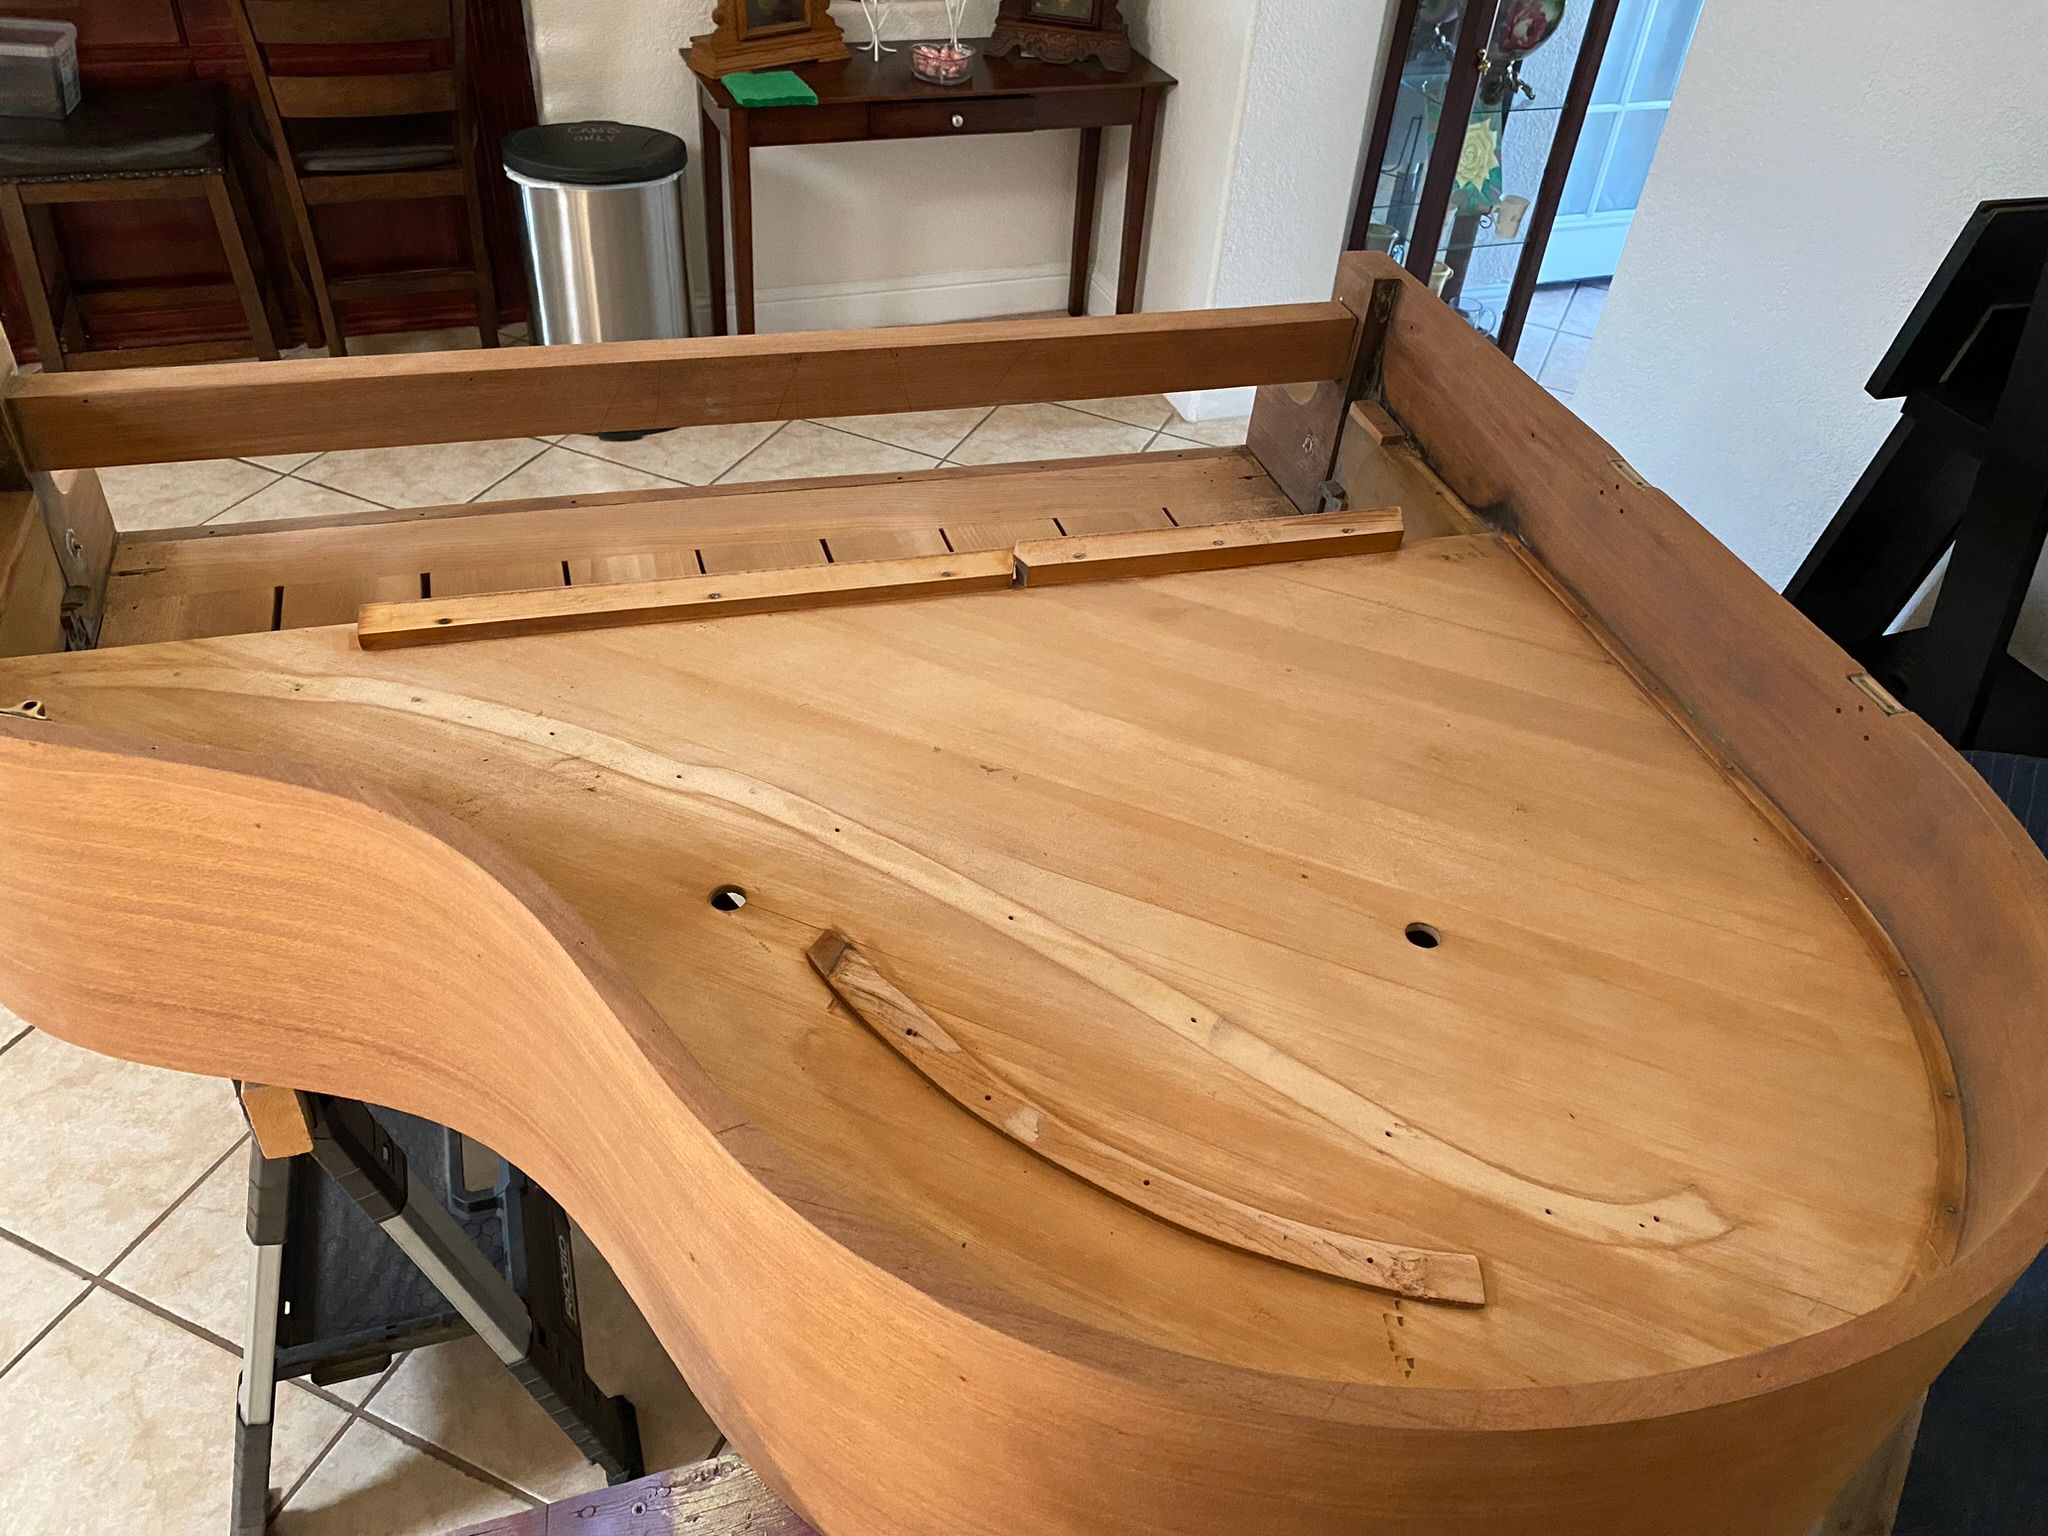
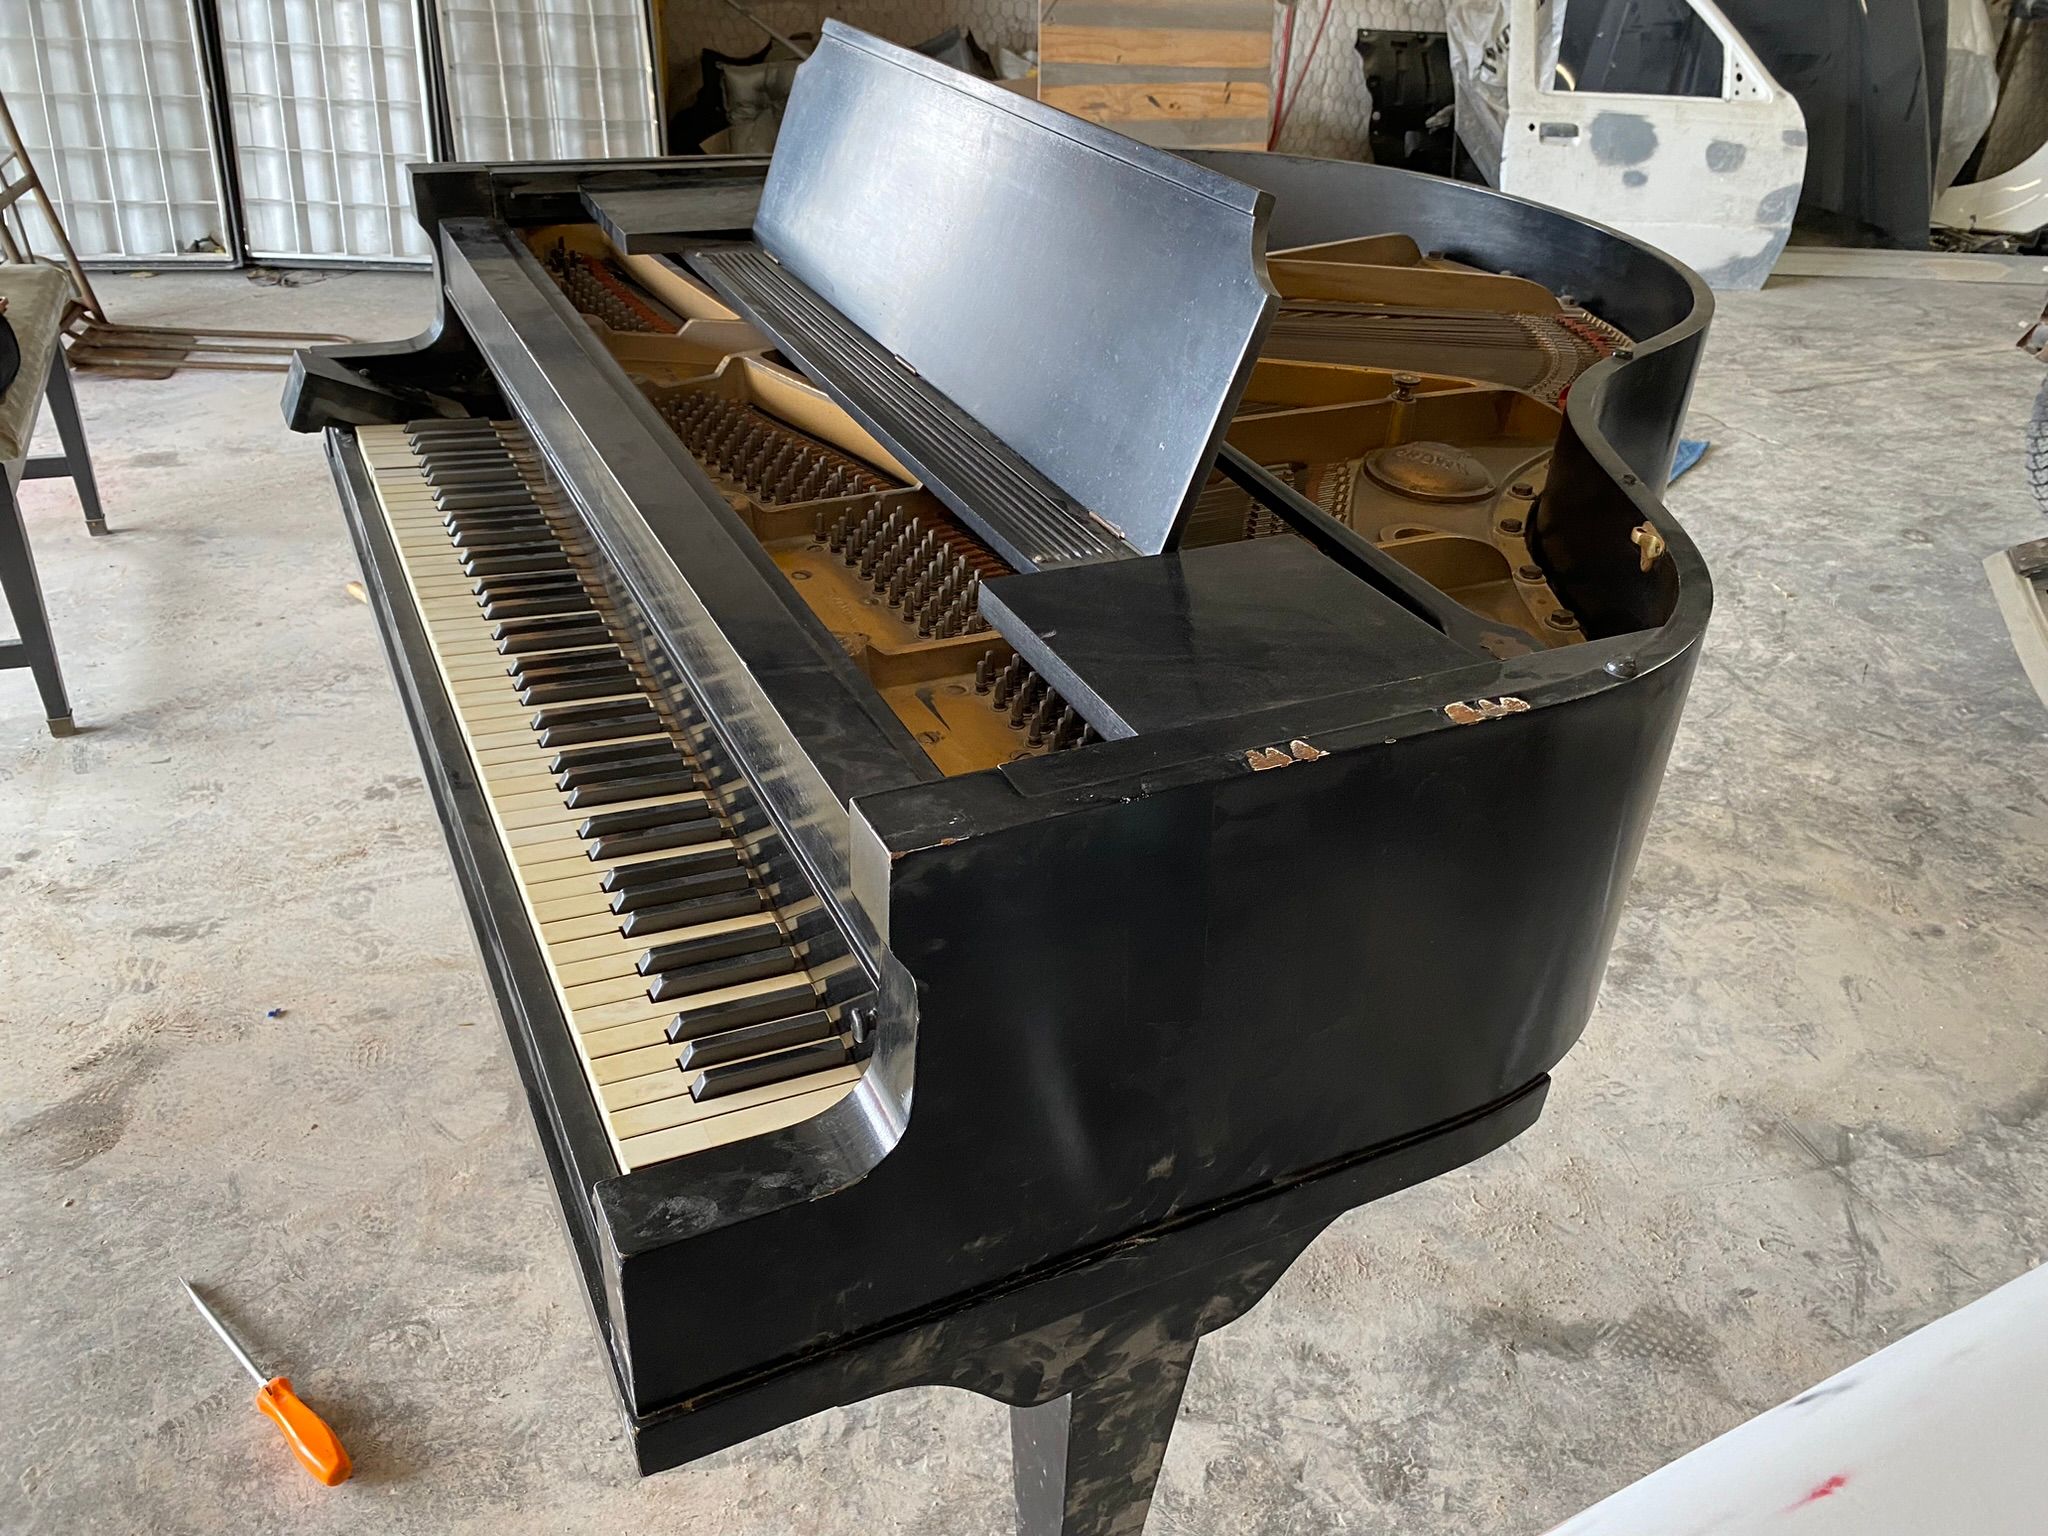
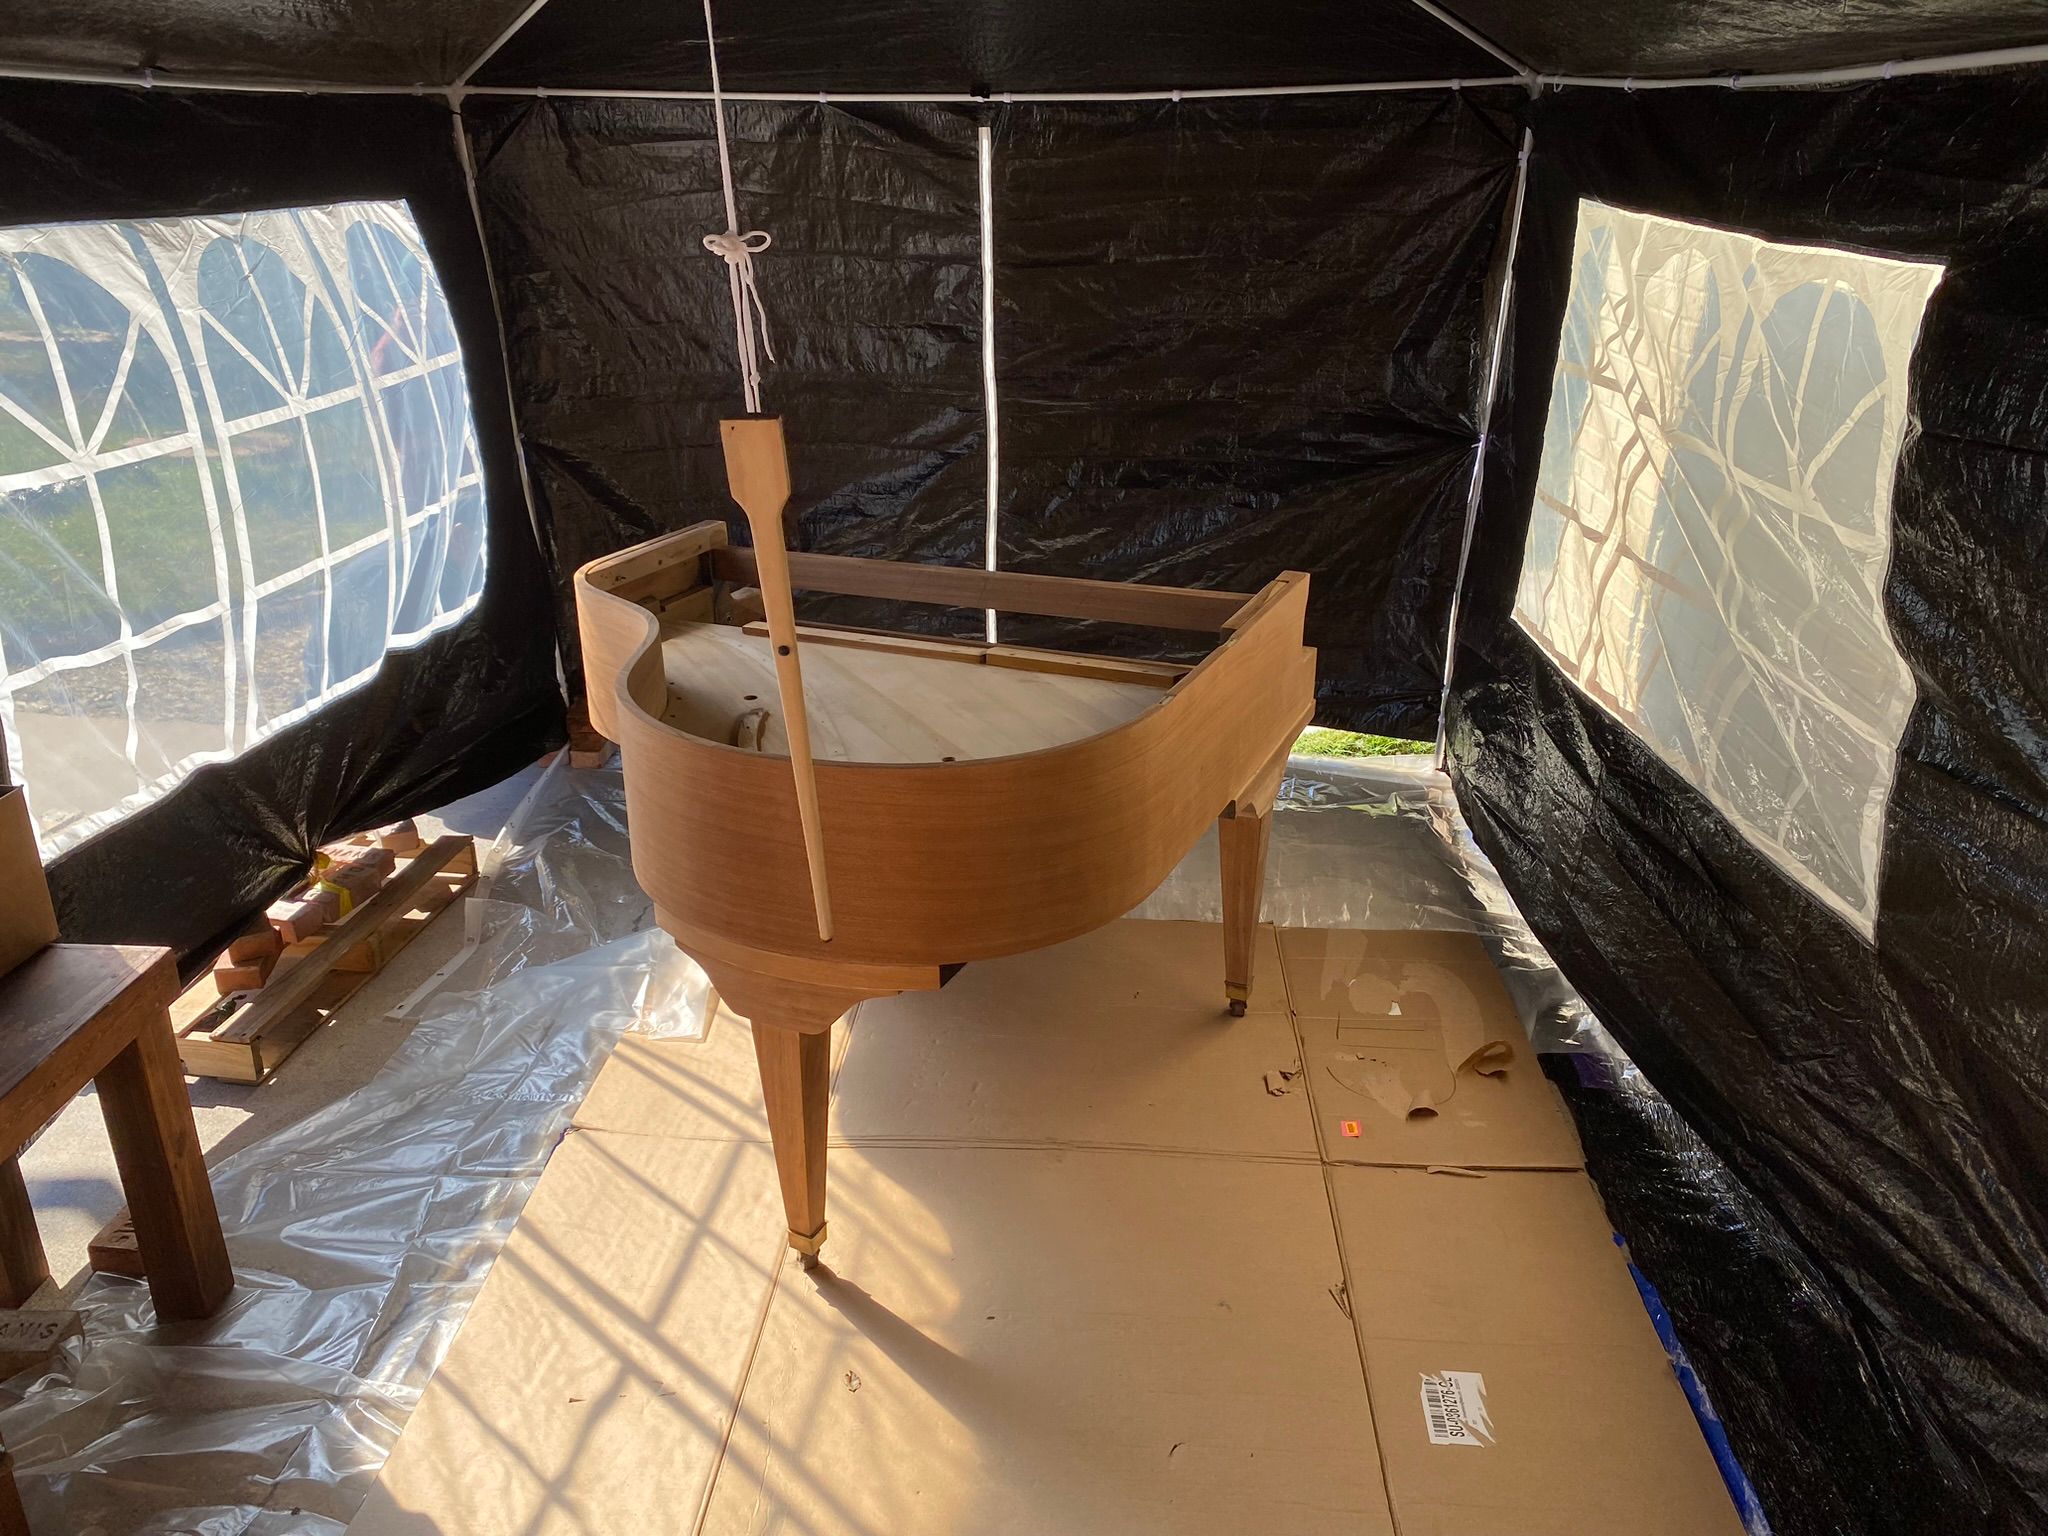
We didn't realize what a job that would be. Pianos are made of many different pieces of wood that are, in many cases, very tiny and oddly shaped. This makes it difficult to sand them with power orbital and vibrating sanders in many cases. We did our best though. First we went very rough with 60 and 80 grit paper to get the bulk fo the old pain and primer off. Next, we moved to a 240 grit to smooth it out a bit more, and finally finished with a 400 grit.

Here's what our progress on one of the larger pieces looked like.

Sanding The Lid

Sanded Lis

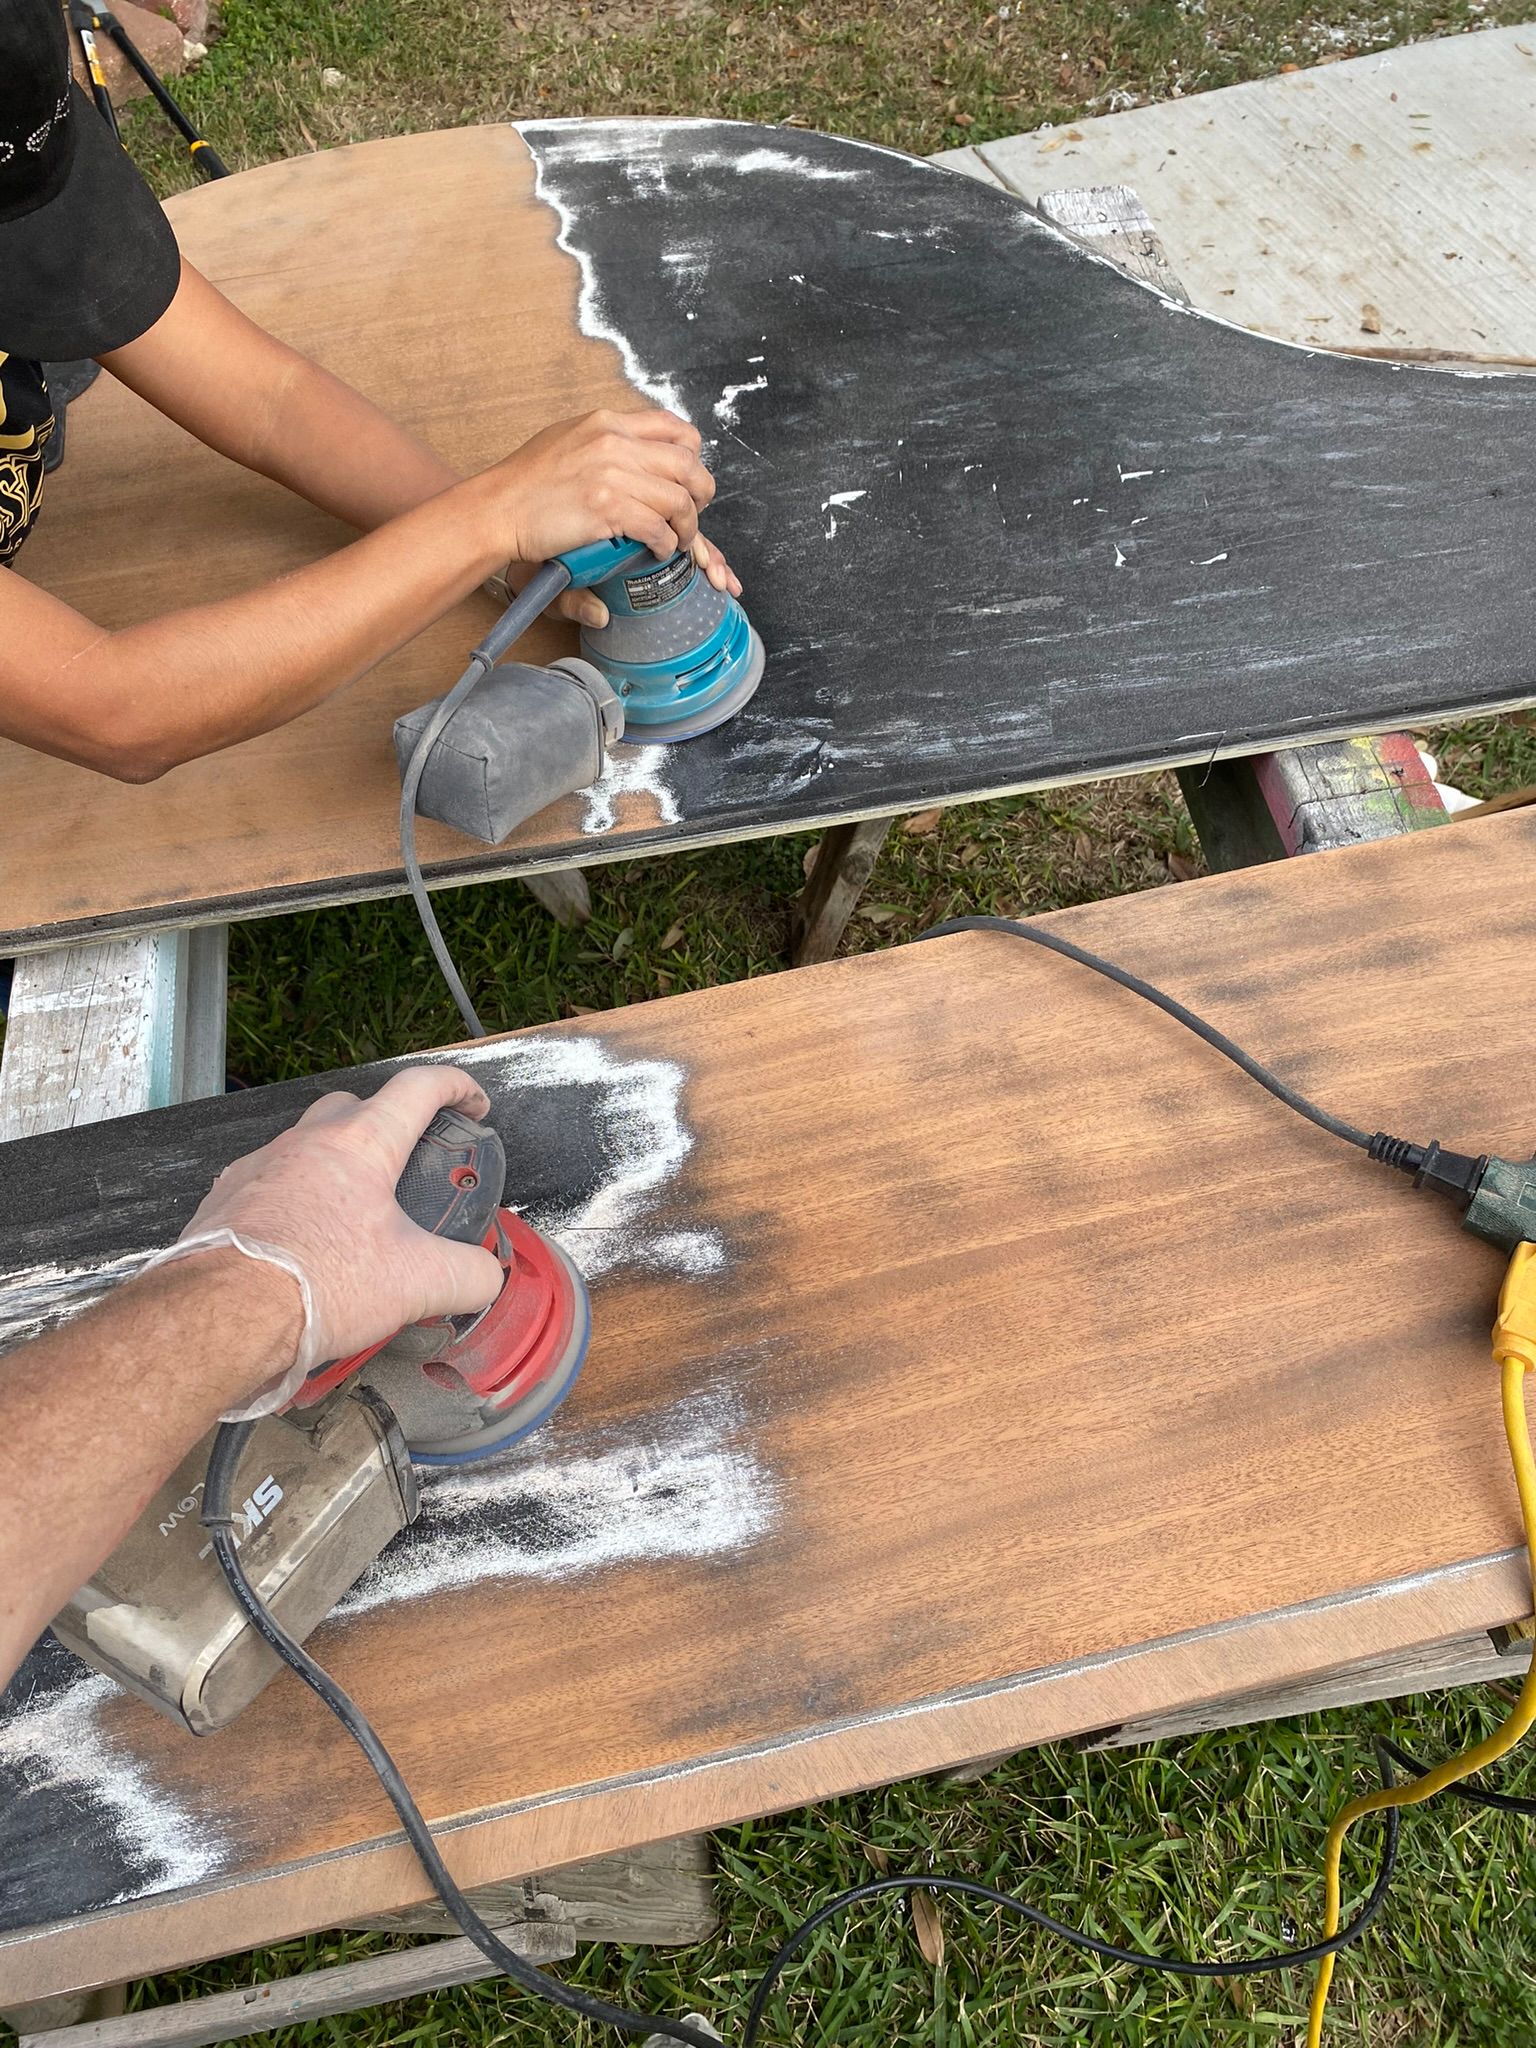
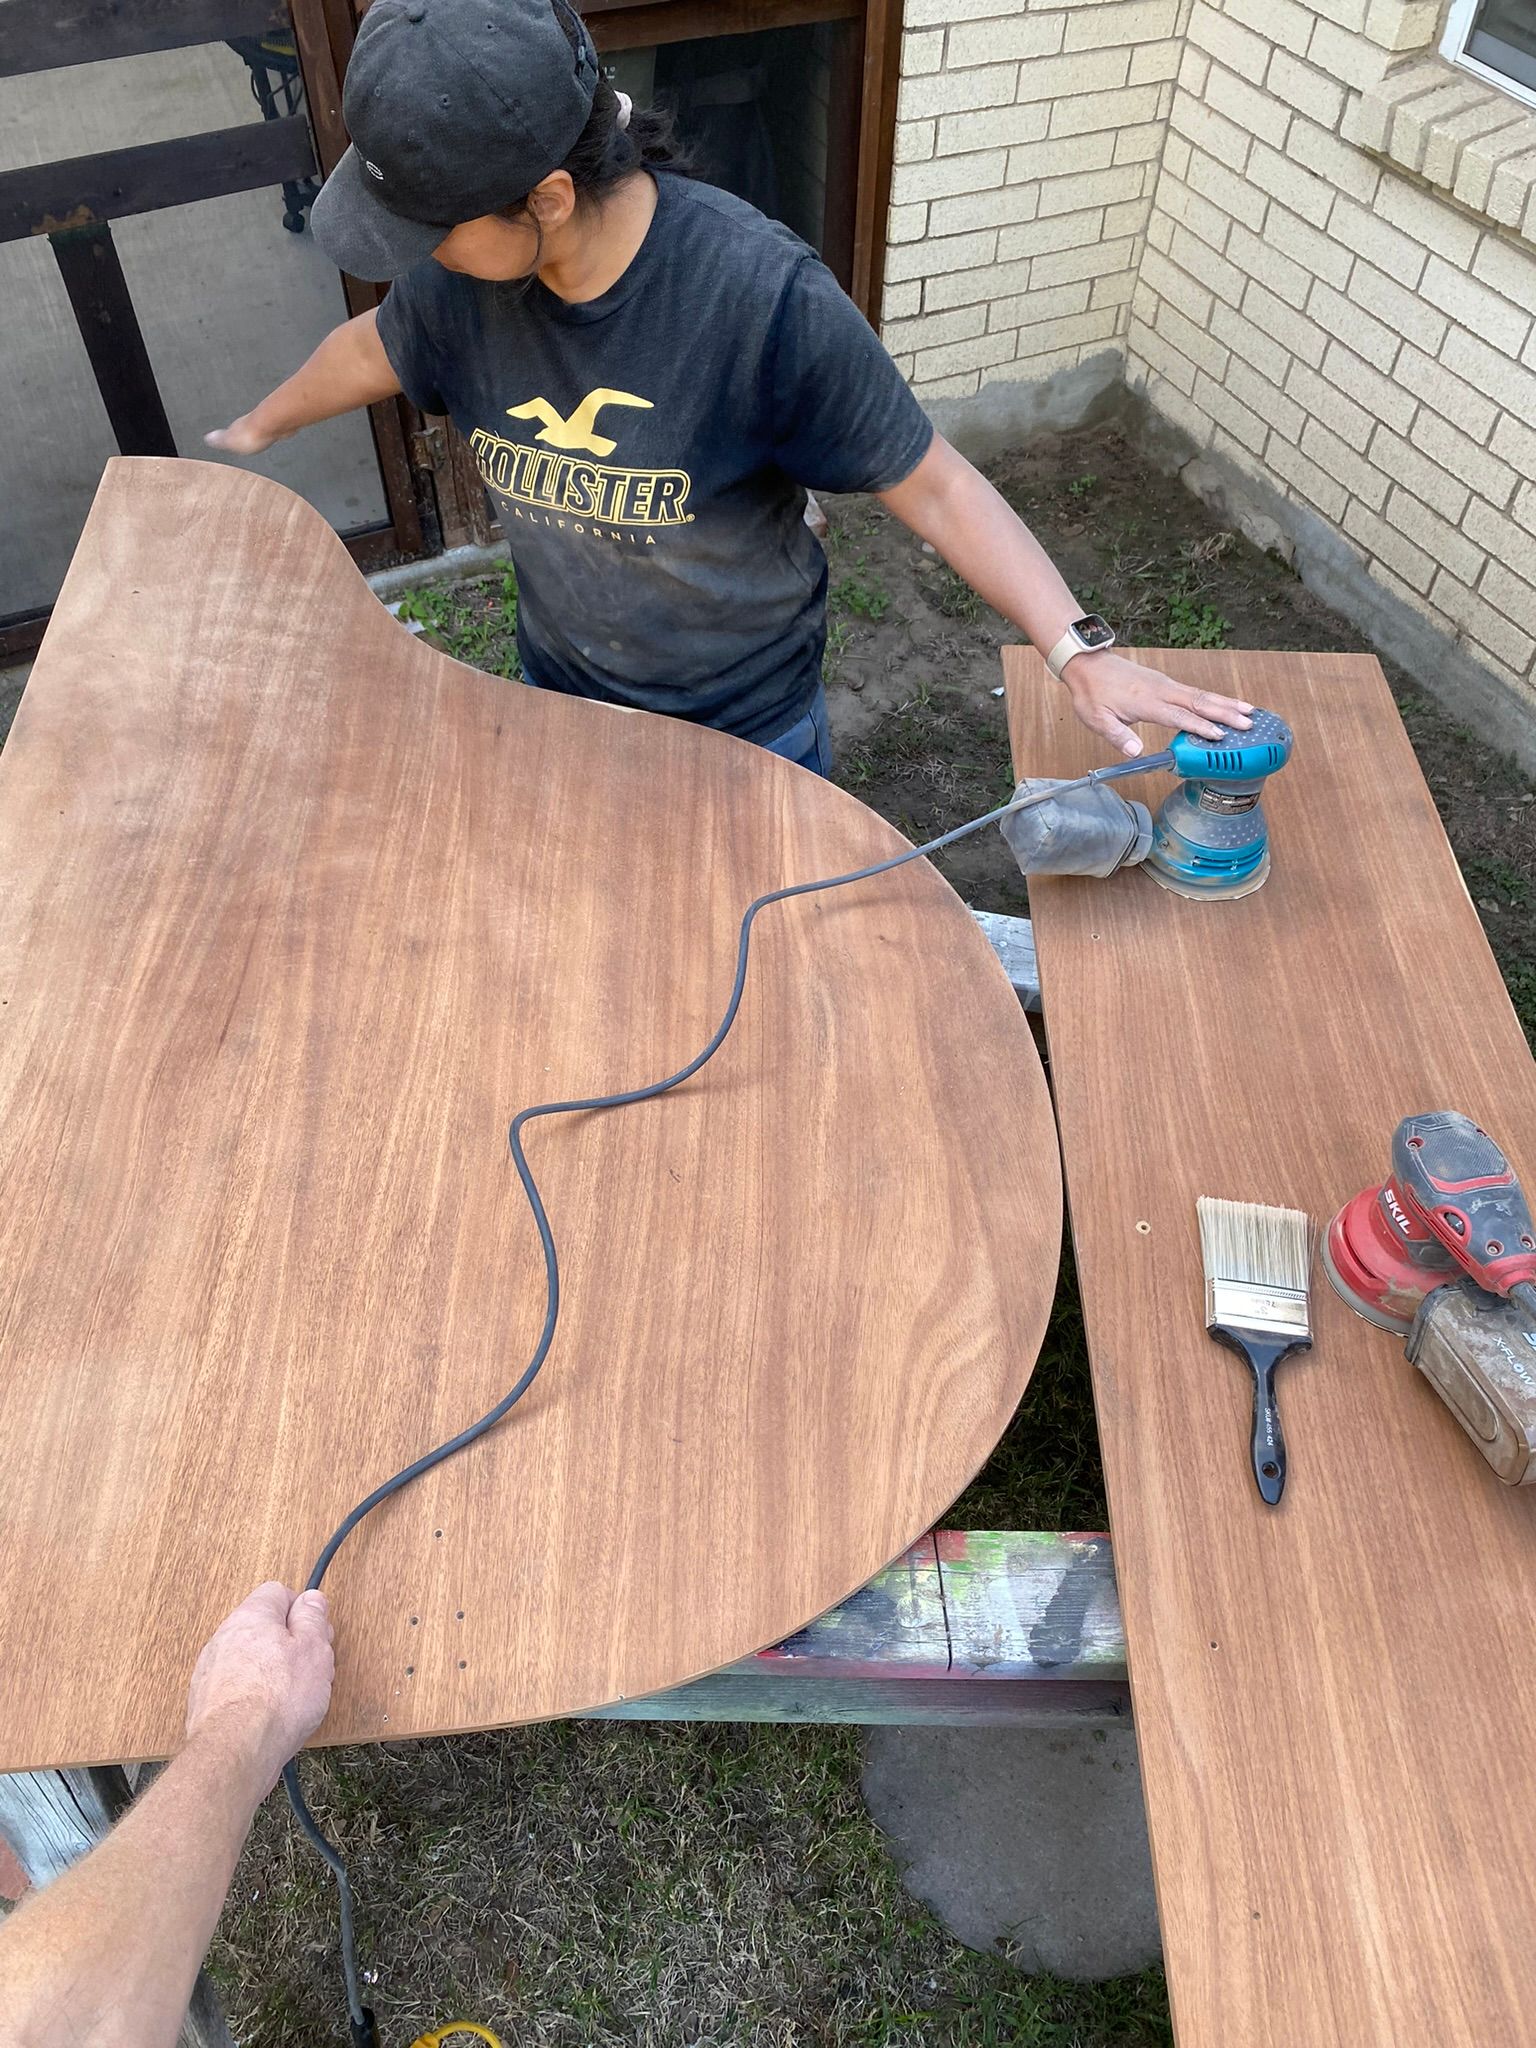
Those two parts of the lid took us about two hours total to sand cleanly. The issue we kept running into was the use of veneer on the different parts. Initially I wondered why on Earth anyone would do that to such a beautiful instrument, but thinking about it I realized, only 2 sides of most wood pieces really look good a lot of times. The edges often don't look as good, so to keep the Piano uniform, and given it's age, possibly to allow for the tapered edges to be more clean, the veneer was put in place. At any rate, the veneer was troublesome for me, as I don't see well, and I sanded through it in a couple of places. Nothing a bit of wood glue and sanded wood savings can't patch though.

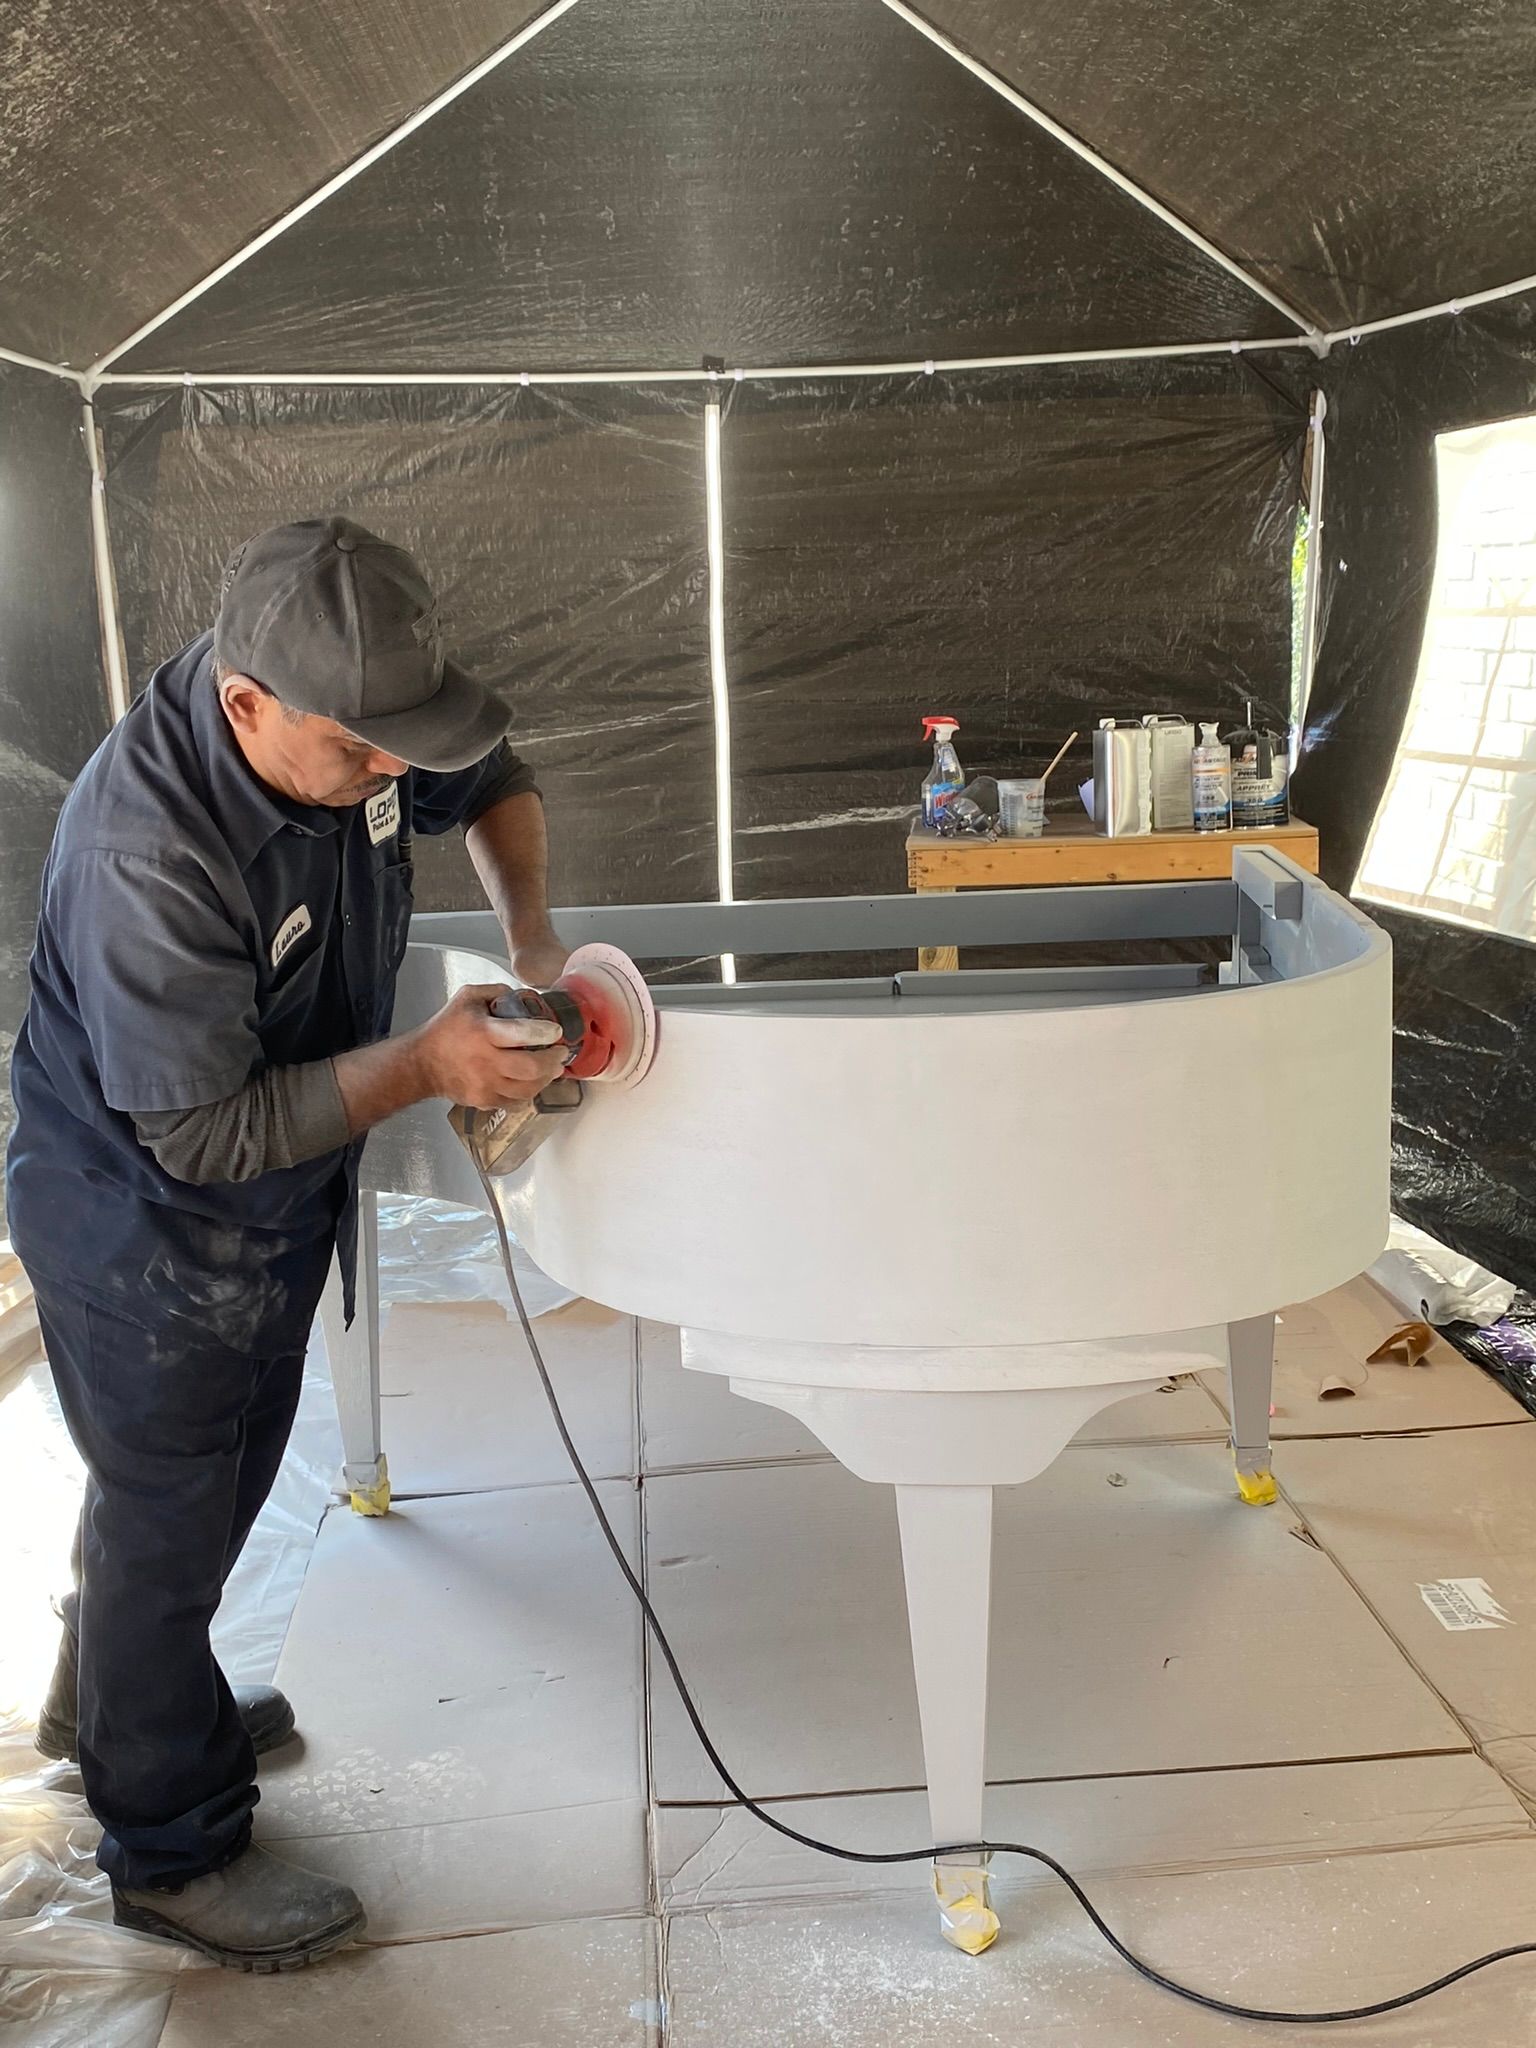
Once my wife's brother arrived, he got to work almost immediately. Now, this is a professional auto painter who normally works in a fully functional shop with all the tools and accessories he needs. Here, 350 miles from his shop, we don't have all of that. We had to make due, so my wife purchased an inexpensive 10 foot x 20 foot Canopy with attachable walls. It was fine. We, luckily had some really great cardboard and plastic around from a recent pallet purchase my wife made for her eBay store, and we used that for the floor.

The canopy wasn't overly well made, but was good enough for what we needed. The important part was it kept the wind out (mostly). Unfortunately, the wind was pretty harsh on the day my brother-in-law was painting, but the canopy was good enough for our purposes.

Piano in canopy prepared for primer

After a bit of setup, the priming process began. It took about 15 minutes, and then we allowed it to dry for a little over an hour. The sun hitting the black of the canopy and walls really warmed it up nicely inside the space, and the primer dried a bit quicker than we thought it might. We started sanding the primer down, then did another few layers, and repeated the process. The second time, we sanded everything really well with some 340 grit paper by hand mostly. My brother-in-law gave a quick, light machine sanding to the whoel thing, but the focus was on hand sanding the whole body at that point.

Brother-in-law sanding the first primer coating

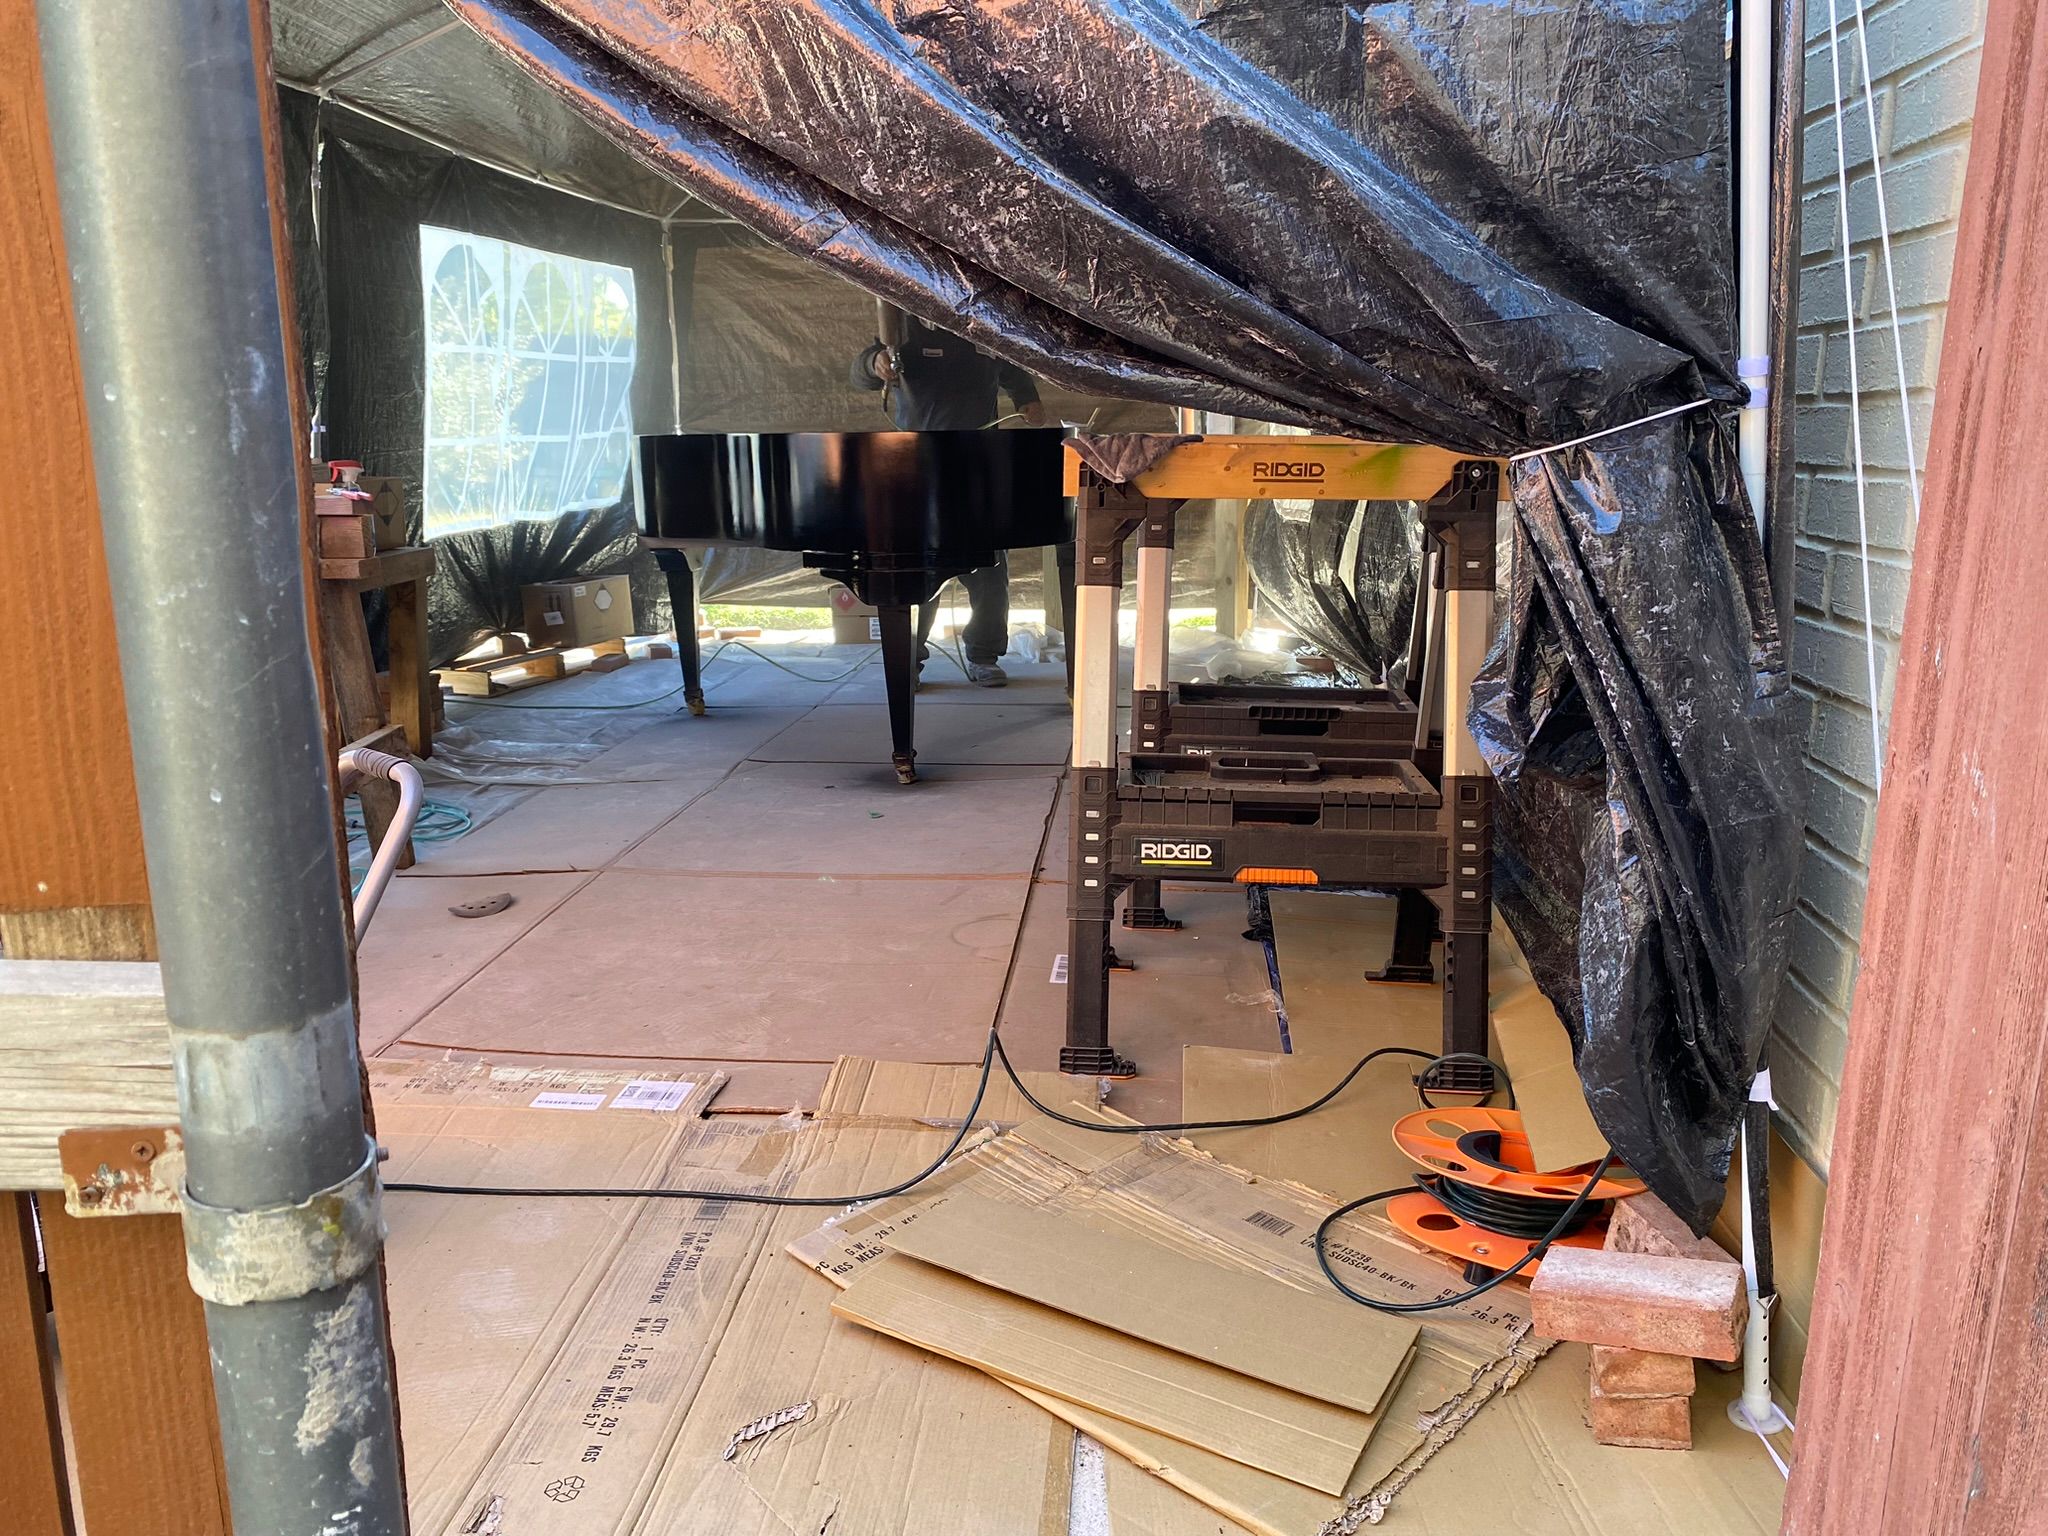
Next, he started painting. It was, again, a fairly quick process. Each time took him around 15 minutes, then he'd wait for 10 – 15 minutes for the flashing process (the time it takes the solvent in the paint to evaporate so the next layer can be applied). Here's what it looked like after the first coat of black.

First Coat of Black Pain Applied

It was already looking 300 times better than when I purchased it. I can't explain the feeling of seeing a project like this starting to come together. It's kind of like waiting for Spring time so you can go on that first swim, or anticipating the end of the last day of school.

After a few layers of jet black paint, it was time for the clear coat. This is the part that really makes a car shine, and in this case, it really makes a piano shine too.

Piano after Clear Coat Applied 1

Piano after Clear Coat Applied 2

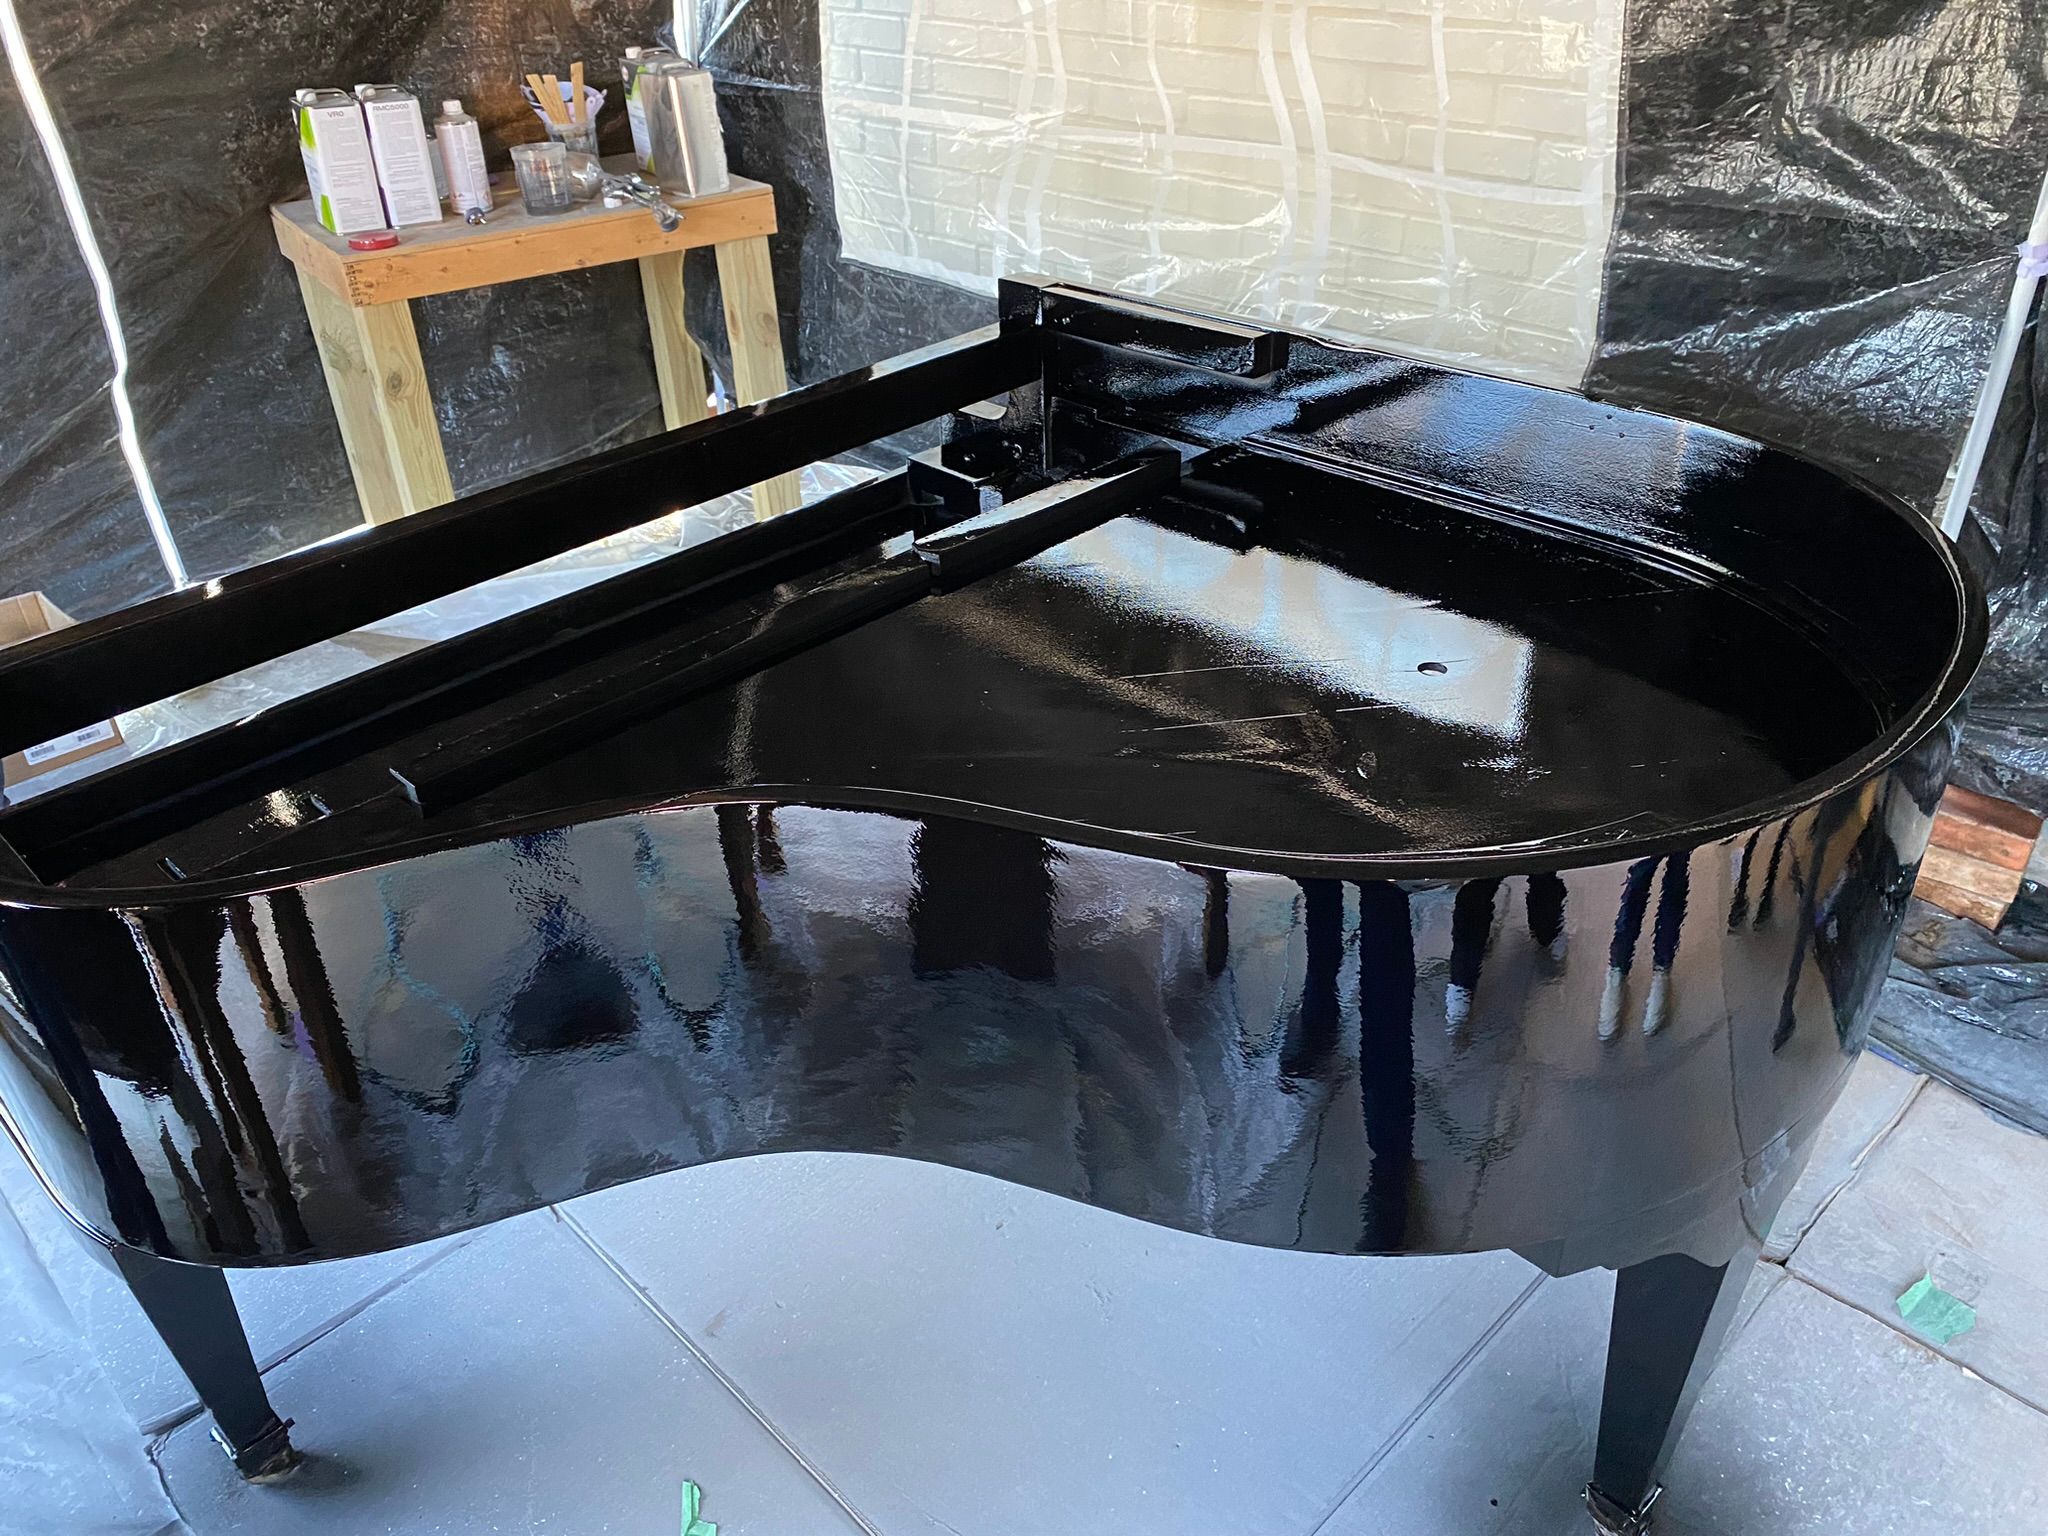
As you can see, it is very shiny already. It's dry in the pictures, but not really dry enough to touch yet. We needed to let it dry overnight before attempting to move it anywhere. My brother-in-law wasn't happy with how the legs turned out, so he decided to take those, along with all the various pieces back to his shop where he can hang them properly and get the paint an clear applied correctly. He'll buff them, and return with them all in a few weeks. He'll also buff out the main body at that time, which should smooth it to a clean mirror-like shine!

Stay tuned, there's more to come.

 
Read more...

from My DIY

The Start of the Real Work

Never having taken on a task the size of this before, my wife and I were unsure what to try. We considered just roughing the existing finish a bit (you know, just scuffing it decently with some finer grain sand paper, then applying new finishes on top of that). We also thought about must sanding down to the primer layer, hoping it wasn't all just a veneer on top of wood. We finally just decided to start, and see where it would take us.

I got out the orbital sander, some regular old sand paper, a broom end my father had since I was a baby, and we started going to work. Initially I wanted to use something around 200 Grit paper on the orbital, just to see where it got us. It did okay on parts of the body with removing the clear coat, but barely scuffed it in other places.

I finally got a bit of the black to come off, and was down to a white primer (such an odd choice in my opinion for a black top coat, but there it was). I kept working at it and got down to where we could finally see the bare wood. It was a tiny corner spot, and we couldn't tell much about it. I think it was just a thin place, because no matter how much my wife worked on it after that she couldn't get through the paint with the 220. I had a single piece of 80 Grit left, and I let her try it, and BAM! She really started knocking out the work from there.

We made a quick trip to the local hardware store and got some 60 and 80 grit to work with, and picked up another rotating sander. This new sander was really great, and my wife loved it. The 60 grit made pretty quick work of the remaining outer body. I focused on the top edge, front edges, and finer line areas that took a bit more work. My wife eventually scolded me for rounding the edges, so I was a bit more hands on with manual paper for the finder details after that.

At last, we are essentially done with the primary body sanding.

Sanded Piano 1

Sanded Piano 2

image

The wood is finally showing, and it is actually really nice looking. We though for a bit about whether we wanted to just try and stain it, but we still don't know what the other pieces may look like. The legs are definitely covered in a veneer. This is problematic, but nothing we can't work around, but I have a feeling we'll end up going back to the black color.

Still a bit of stripping work to be done.

 
Read more...

from My DIY

A History of Me

I'm many things. A silly, but lovable movie I saw called Renaissance Main (1994) had a sub-story where our protagonist was telling a student of his that you can be more than one thing in lief. This is what a Renaissance Man means to me.

That said, I'm a son, brother, husband, father, writer, physicist, musician, creator, martial artist, teacher, hobbyist software developer, and forever a Student.

I try to learn one new thing each day. Anything will do, it doesn't have to be some major revelation, but simply anything new.

How I Got to this Point

I started piano lessons when I was about five years old, and took them for around six years. I enjoyed it, and still do.

As time has marched ever forward, so has technology. I bought my first synthesizer keyboard in 1991 and it was life-changing for me. I had worked with a friend who had a Yamaha V50,

Yamaha V50

and the music he was able to create with it was absolutely insane to me. I looked for the same keyboard, but it had been around for a few years, and I wasn't overly knowledgeable about the myriad of offerings on the market at the time. I ended up getting a second hand Peavey DPM 3se.

Peavey DPM 3se

I save my life-guarding money for an entire summer, and purchased it cash for about half it's normal retail value, which at the time was $3000.00 US).

This digital beast was a turning point for me in creativity. I loved creating new songs using all of the voice polyphony (16) that this thing could give me. The drums were incredible, the piano sound was really good, strings were awesome, and so many other great libraries. They all fit on a tiny 3.5” floppy disk. You also saved your song files to floppy as well. I used that machine for the next 14 years.

I finally decided I wanted to try something new, and had seen some weighted key keyboards at a music store. Full sized, 88 key machines that were even more amazing than the Peavey I loved so much.

After doing a bit of research, I purchased a M-Audio Keystation Pro 88.

M-Audio Keystation pro 88

What i wasn't expecting was the lack of synthesizer, build in sounds, no built-in sequencer, it was just a giant, heavy, $500.00 controller. My research wasn't so great it would seem. Once I hit a few forums, and I'm sure gave a few people the opportunity to shake their heads, and laugh at my naivete, I understood what I needed. I needed a special separate box that would act as the brains of the operation. I jumped over to eBay and started the search. I picked up a Yamaha ESXR synthesizer,

and with some fiddling was able to get it to work beautifully with the Keystation midi controller.

A few years later, I bought a first generation Macbook Pro with the Intel core chipset. It was then that I discovered Garageband! This software, combined with their incredible sound libraries was an absolutely insane step forward for me. I could not only record a track, but I could see the piano-roll, the position on the timeline, and duplicate tracks, sections, and so much more. I was in creative-person heaven for sure.

Time Does Fly

When I say these devices unlocked my creative side, I mean I could sit down at my Peavey in the evening around 6 PM, and I would look up thinking I had only been there for 20 or 30 minutes, only to find it was past midnight. I lost all sense of time when I was working on a new song.

My Grandest Idea

Here we are, 20 years later, and I'm trying to realize a dream that I've had since I was around 14 years old. I've always wanted a Baby Grand Piano in my home. Not just because they are magnificent looking instruments, but because I love to play.

I worked for a couple of years as a Police Officer at a University, and every spring they would fill the main hall of the Fine Arts building with about 20 different Baby Grand Pianos. I would take my break and lunch in that hall the entire time they were there, unlock the doors, and play on each one. I'm not any kind of amazing pianist. I play mostly by ear because my eye-sight is worse now, and music is generally pretty small. I love to play and sing along (by myself because I'm also not any kind of singer). I play songs I loved growing up. Songs my daughter thinks are old and crappy no doubt, but it relaxes me. it's a chance for me to get lost for a few minutes at a time.

I started watching videos about tuning pianos earlier this year, because we have no piano tuner in my town, and my Aunt wanted her piano tuned up. I learned how to do it, and did (at least an ok job). As it does, the algorithm of YouTube brought me to several videos on people refurbishing old grand pianos.

I then watched several really great videos on the Late Night DIY channel by a guy who plays at piano bars, and builds a baby grand style cabinet for his digital piano to use in his show.

I saw one guy take a fairly nice baby grand as far as aesthetics go, and tear it down and put int he guts of a digital piano he bought for it. It was awesome! I was inspired.

I started shopping for old baby grand pianos for sale, and eventually found one that seemed to fit what I was looking for. I was able to purchase it,

image

image

and with the help of my Wife and her brother, we gutted it clean.

image

image

Now, the real work begins...

 
Read more...